10 Easy And Fun Art Ideas That Look Professional
Art is endless and so is creativity. That's why there are often articles with hundreds of art ideas but scrolling through them is exhaustive - probably taking longer than the time it takes to make the artwork. So, here are a few creations you can try that are popular, as explored on Google and your favourite craft website, Pinterest.
Art projects that are really fun for all ages can use simple materials for making pulled string art, collages, drawings, tape art and watercolour masterpieces.
These are really easy and inexpensive activities that anyone can do with things you most likely have at home already, such as paint, paper, tape, strings, and pencils. Additionally, the first 8 are my favourite that I've done with kids and adults and even though I'm not that artsy, the end results left me satisfied and happy.
If you want to decorate your desk or wall space, do a fun activity to pass the time, or have a kid's art birthday party, you'll enjoy these projects. Although they're not very difficult, they look like a professional made them. Don't believe me? Then check out the artwork.
1. Pulled String Art
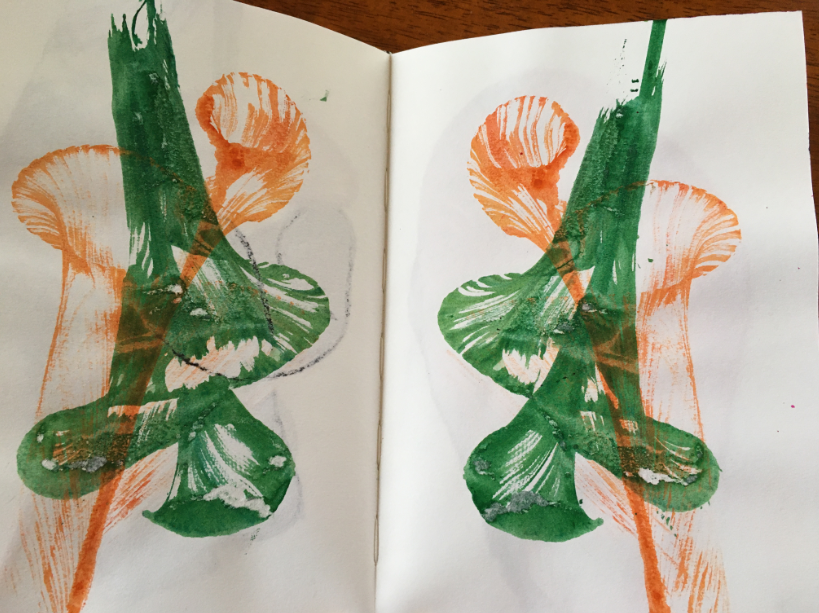
Also known as pull string art or string painting, it's a really fun art idea that's on the rise and easy to make with cheap equipment. It's one of my favourite, creative art designs and as seen by Youtube comments, adult art classes loved string painting but kids will also love making pulled string art.
What string do you use for pulled string art? You can use any type of string or yarn - just make sure you have lots of it and it's long (40-50cm at least).
Pulled string art uses string dipped in acrylic paint mixed with some water or watercolour which you put on paper, cover it and pull the string down.
The most used design for pulled string art is flowers. The instructions are certainly easy and you can do it anywhere - on paper, an art book, or even on a canvas.
Here is what you'll need for pull string art:
- Thick paper
- String (40-50cm is a good length)
- Ink, watercolour, or any paint mixed with some water so it's more fluid
- Small cups for the watercolour or paint
- Something heavy like a book
Follow these simple instructions to make pulled string art:
1. Choose the colour you want
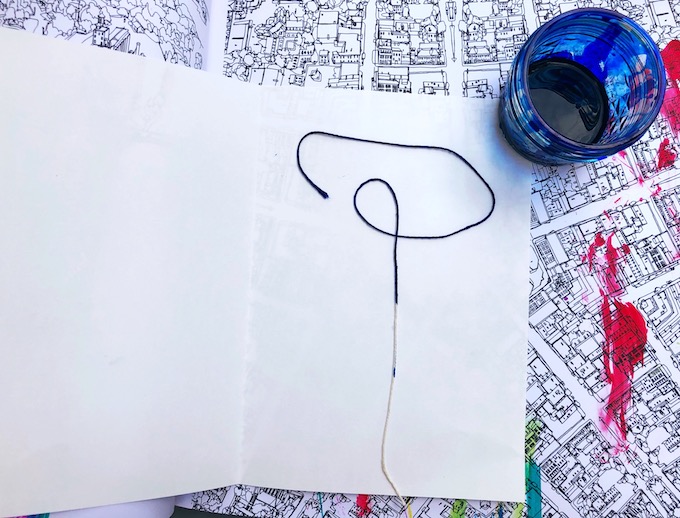
Dip the string into a cup of paint, leaving a few centimetres (3 or 4 is enough) clean at one end so you can hold it.
2. Set up your design
Fold your piece of paper in half and open it again. Next, place the string in the position you want on one side of the paper, with the clean end closer to you.
3. Fold the paper again and put the heavy book on top
Though it's easier to put the paper within the book and then close the book, so use a book you don't mind getting dirty - like an art book. Or if you don't want to use a sheet of paper, you can simply do it straight into the artbook.
4. Check out the results
Pressing down very firmly on the book, pull out the string towards you, keeping it in the same spot and not moving side to side for a nice look. Then, open the paper or book and you will see your beautiful art mirrored on the page.
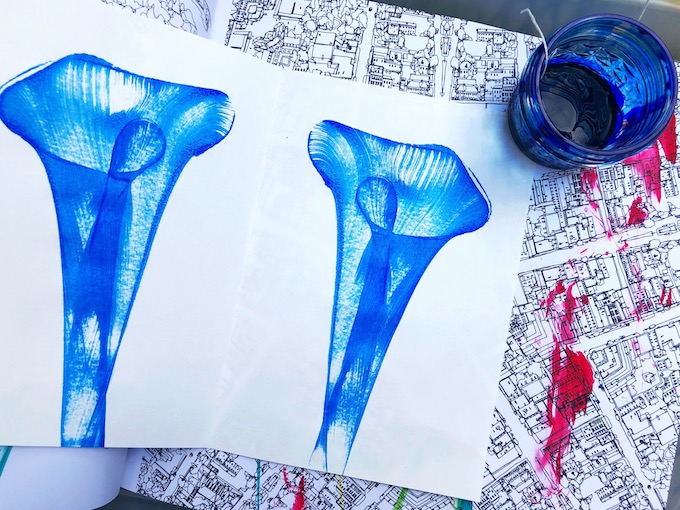
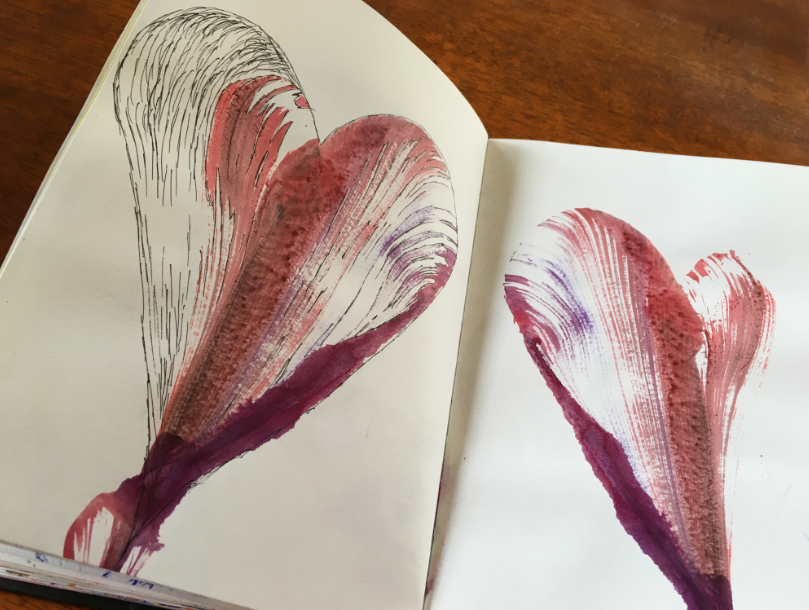
And with all art, the best part is experimenting. You can try putting more than one design on one page and even try multiple colours on one string. Another idea is also trying to make different shapes, such as a heart as I tried.
Uniquely, you can mix different art mediums together for more creations. On top of the string painting, why not try decorating it with a fine liner? I found that the fine liner contrasts nicely with the paint to highlight it more sharply and make it look defined. So, you can start with one medium and explore what works best with it.
Some art mediums include pencils, markers, pens, crayons, oil pastels, and chalk.
2. Collage
One of the most known and popular art creations is collage. It's great for variety and is especially fun for kids.
A collage is seen as an art technique made by assembling together different materials and forms. That can include sticking on photos, tissue paper, magazines, newspaper, paper and many more various materials that can be found.
What glue do you use to make a collage? The best glue to make a collage is PVA glue as it sticks well but other normal glue can work too for cheaper, everyday use.
To make a collage, start with these steps. Gather what you need - the paper, book, canvas, or whatever you want as the base; glue; scissors and the materials to stick on it. Next, glue your chosen materials onto your page however you like.
We've most likely all done it as a child and it's perfect for getting rid of scraps that you have lying around, such as old magazines. It would be fun as a kid's art birthday party but would be just as engaging as a project for yourself and could look good on the wall or desk.
A collage can have as many pictures on it as you want or as little as two. Here is an example of a simple collage made from magazine cutouts.
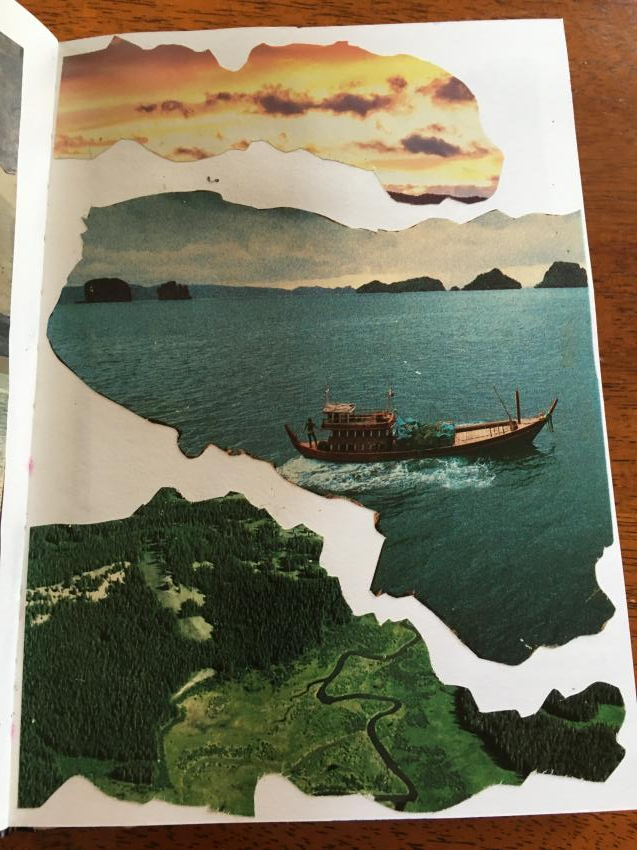
Making it look professional may be a bit difficult but try to make the pieces match with a similar feel. Some interesting ideas I've seen work well are to try are using pictures with the same colour; ripping instead of using scissors; and cutting the materials into the same shape like a hexagon.
3. Just drawing
Many people struggle with finding art inspiration and it is hard sometimes when you can't think of what to make. To start off with, anything can be an inspiration.
The best way to find inspiration is in the world around you and in your mind. To be really motivated in your art project, it should be something that matters to you that you like and enjoy making. By all means, you'll feel more proud and satisfied if the idea comes from yourself.
These ideas are here to spark your imagination and from them, you can create art that is special to you. So, don't feel like you have to follow them exactly.
Just drawing is a great way to relax and focus your mind soothingly on something. Thus, drawing is good to do when you're alone and bored but you can also do it with others. Kids can especially have fun with drawing, although it may not look as professional it will be sweet to look back on when they grow older and it looks good on their wall.
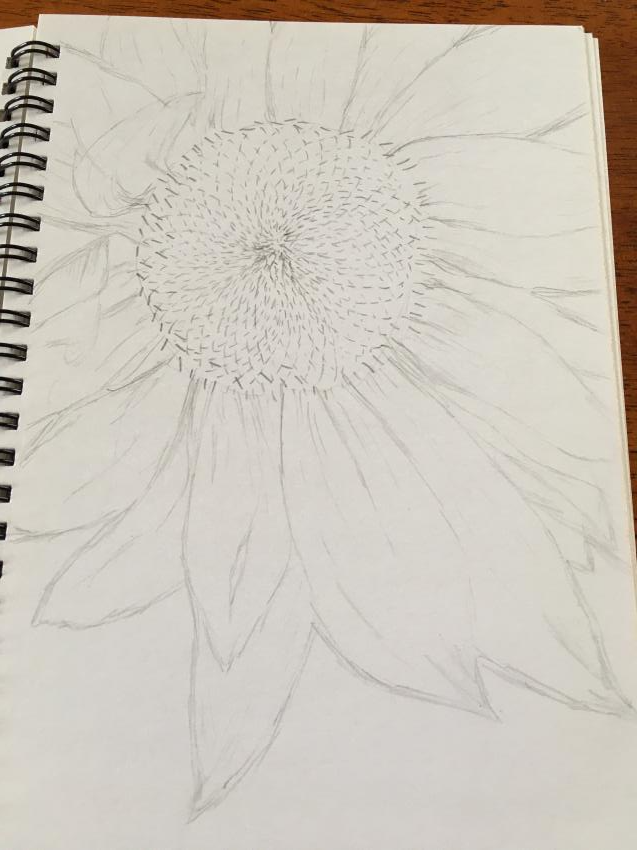
All you need is paper and drawing utensils, which can be coloured pencils, markers, crayons, and more. If you don't know what to draw, here are ideas. In your sketchbook or paper, one idea is to draw whatever's around you - an object or surroundings. When you're bored, a beginner or anyone can draw a simple object in front of them like a flower; easy nature; or a 2D picture from the internet, your favourite book, or more.
Moreover, it helps take away your worries as you focus and you may be surprised with the results. And, to make your drawing more fun or creative, you can add different, imaginative fantasy elements and colours to make your sketchbook drawing look good. For example, you might draw your bed in a forest with magical creatures.
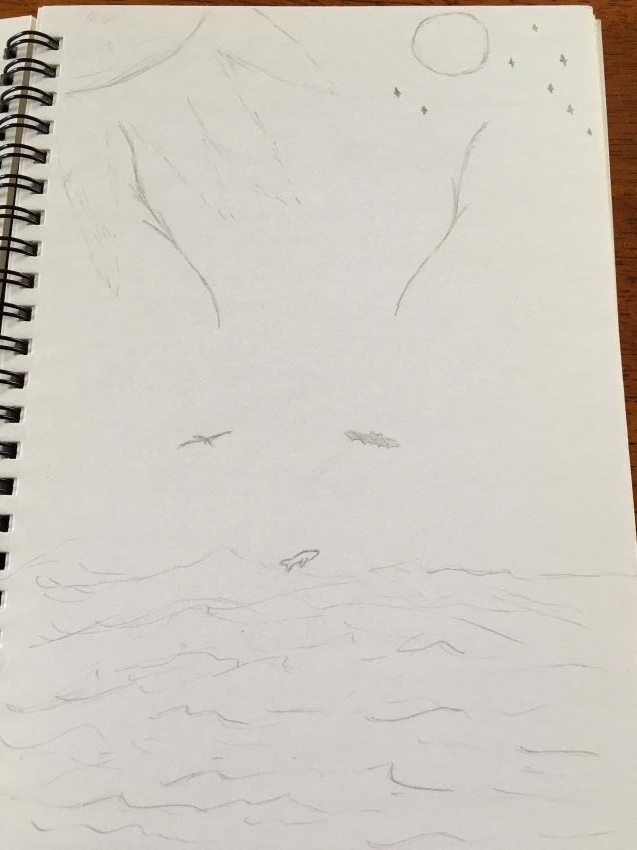
Another experiment I tried was listening to music while I drew whatever came to mind from the drawings. This is for people who love abstract drawing and just having fun with their imagination.
Hence, the art inspiration can come from the song lyrics or associations, and from there, you can expand the drawing. It also makes it more entertaining and fun for music lovers. Similarly, food, TV, movies, and other things you love can become an inspiration for your drawings.
4. Tape art
An art technique you might have seen many times and wanted to try is tape art. The lines the tape leaves behind make it look like stained glass and it's really beautiful.
Tape art uses strong tape on canvas and paint - instead of spray cans back in the 1960s from urban art, which this creation originated.

Here is what you need to make tape art:
- Tapes such as masking tape or duct tape
- A canvas
- Paint and paintbrushes
Follow these simple steps to make tape art:
- Stick the tape on the canvas to make your desired pattern. Where you place the tape will be the white parts and the space between the tape is where you'll paint.
- Now, paint between the tape. Use one or more colours as you wish. (It's okay if the paint gets on the tape.)
- Peel off the tape. Finally, your masterpiece is done.
Can you use normal tape instead of masking tape?
You can use normal tape or masking tape for tape art on canvas but the normal one may not be as good. Also, masking tape gives you thicker lines but if you want to vary sizes, you may use normal tape as well.
What is the difference between the masking tape and painter's tape?
Masking tape may leave a bit of residue as it is meant to be very sticky. On the other hand, painter's tape, or artist's tape, will leave a clean line instead of sticky remains.
Thus, painter's tape is more suited for artwork like tape art. However, painter's tape is more expensive so you should only buy it if you'll use it often or for professional works. But for a cheap option, masking tape works just as well and is used a lot.
Additionally, if you don't want to buy a canvas and want something cheaper on paper or in an art book, there is an alternative way to make tape art that I used. Although it may look amateur in the process, the result is the same. All you need is sticky tape, paint and more paper. To point out, do not use tape on your paper/book as it may rip the paper and ruin it.
- Cover your workspace with newspaper if you want to keep your table clean.
- Then, cut paper into strips, as long or short as you want to substitute as the tape lines.
- Over your paper or art book that will be your artwork, place the strips in the position you want. Stick the strips together where they connect with sticky tape and leave them long enough to hang over your paper/book. Attach them to the newspaper underneath so the strips don't move.
- Now you can paint how you like.
- Once it has dried, take off the strips, and you are done.
Tape art is great to do alone as a project and it looks like it was made by a real artist. Furthermore, it's perfect to hang up as a wall decoration, especially on a big canvas.
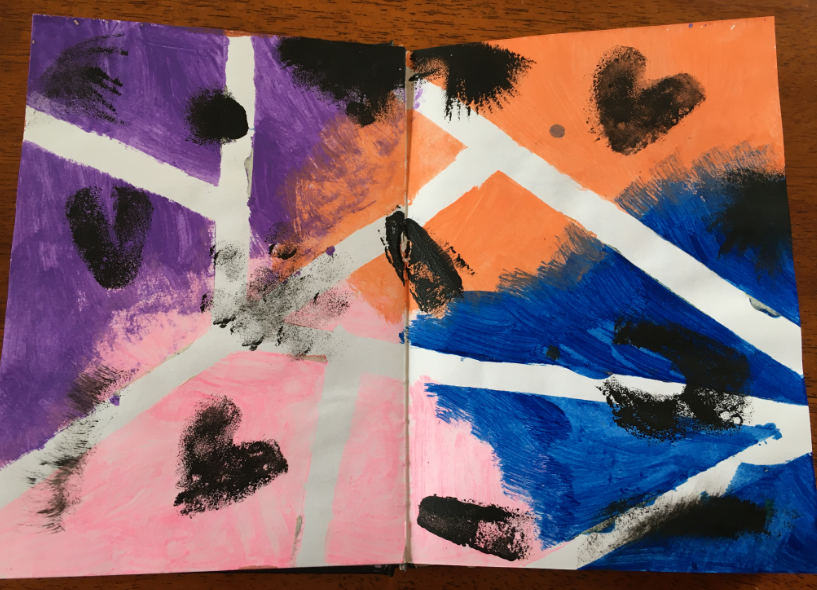
Additionally, like all art, you can experiment. Some ideas I've tried are doing different shapes, using colours crossing over the lines, or multiple colours or watercolour gradients in one section. And, you can even apply different mediums such as sponges like I did. It might not look the best, but that's the fun of experimenting!
5. Watercolour
The best art activity to do with kids or with others is watercolour. They will love making it, especially with the messiness and it's perfect for a birthday party. Before you know it, you'll also find yourself having fun. On the positive side, it can be cheap and very easy - there are no set rules.
Some watercolour is more expensive than normal paint because it takes longer to process with a higher pigment concentration but one tub can last a long time. Nevertheless, cheap watercolour works just as well as more expensive ones. The quality is still good.
All you need for watercolour is the paper, canvas, or artbook you want to work on, watercolour, paintbrushes, water, and small jars. Since it's messy, it's best to cover your workspace with newspaper.
It's really easy and even good for beginners. Here is how to do watercolour for beginners:
Firstly, set it up by putting the water in the small jars. Wet your paintbrush and dip it in the watercolour. Then, start painting on your paper. You can paint objects, people, landscapes, or even just abstract designs. No matter what you do, you can make it look professional with watercolour. You don't need a lot of paint on your brush or the paper - it's a nice light or a mix of light and dark.
A fun way to use watercolour that all ages will enjoy is getting creative and messy with it in an abstract way. This allows you to do whatever you like and it also looks amazing at the end - like it belongs in an art gallery.
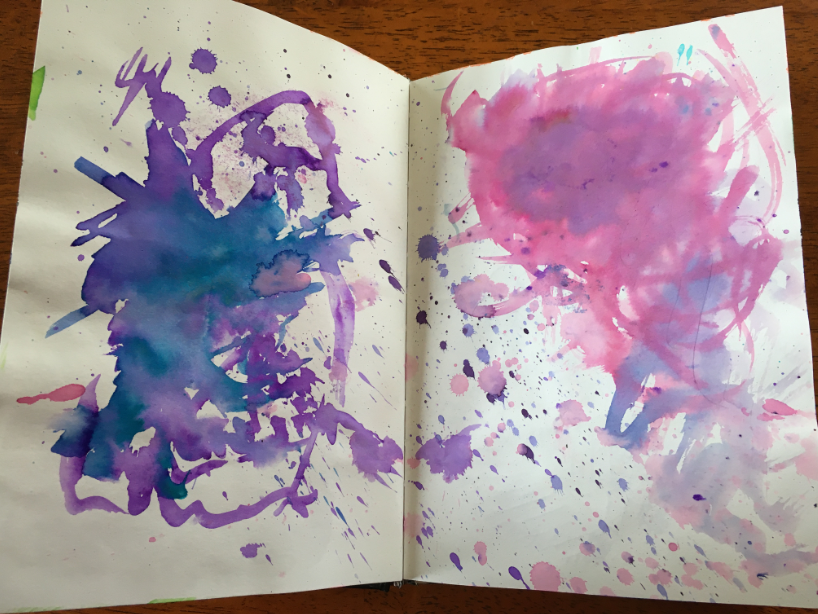
What you need for abstract watercolour:
- Watercolour
- Water in a spray bottle
- Paintbrushes
- Paper
How to make abstract watercolour:
- Spray water from the spray bottle onto the paper. The paper should not be too thin otherwise it will get soggy.
- Straight away, use the paintbrushes to put watercolour on the paper. You can drip it down from the brush, touch the paper, or paint. Put the watercolour in different spots around the page, varying the amount of watercolour.
- Next, use the brush to move the watercolour around in the water.
- Let it dry and you are finished.
Also, for a beautiful abstract watercolour, use more than one colour that will go nicely together so you can blend and mix them in the water.
Acrylic paint is easier to use than watercolour because watercolour is more difficult to control or predict, and cover up mistakes. It's also more complex to learn the various techniques. While it can be hard to get good at it, the best way to be good at watercolour is to practice a lot and experiment with different brushstroke techniques, styles, and amounts of watercolour.
These are tips that I've tried and worked well, and here are more.
Different creative ideas with watercolour to try:
- Use the paintbrush to flick the watercolour onto the paper. Alternatively, you can use a toothbrush to try another effect.
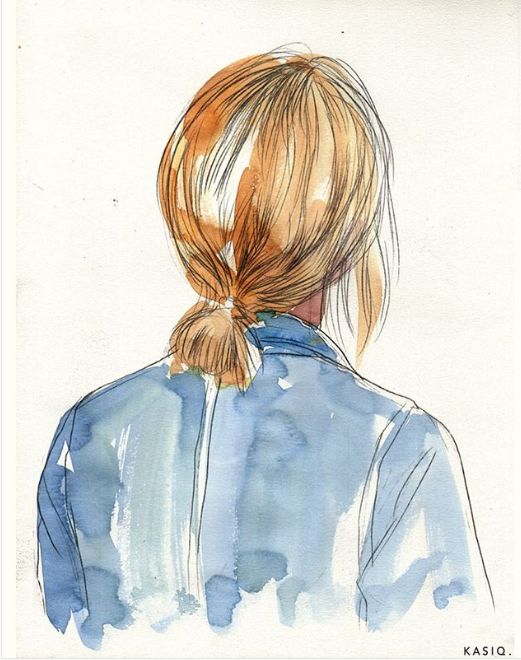
- Sketch a picture finished with fine liner before colouring it with watercolour. It doesn't have to stay within the lines - making it go out of the lines gives it the gorgeous watercolour look. Notably, fine liner drawing makes your art stand out more defined and elegant.
- Use some watercolour to just paint most of the page for an aesthetic background. And you can later draw on it, write on it, or use it as an amazing birthday card.
6. Blind contour drawing
What is blind contour drawing?
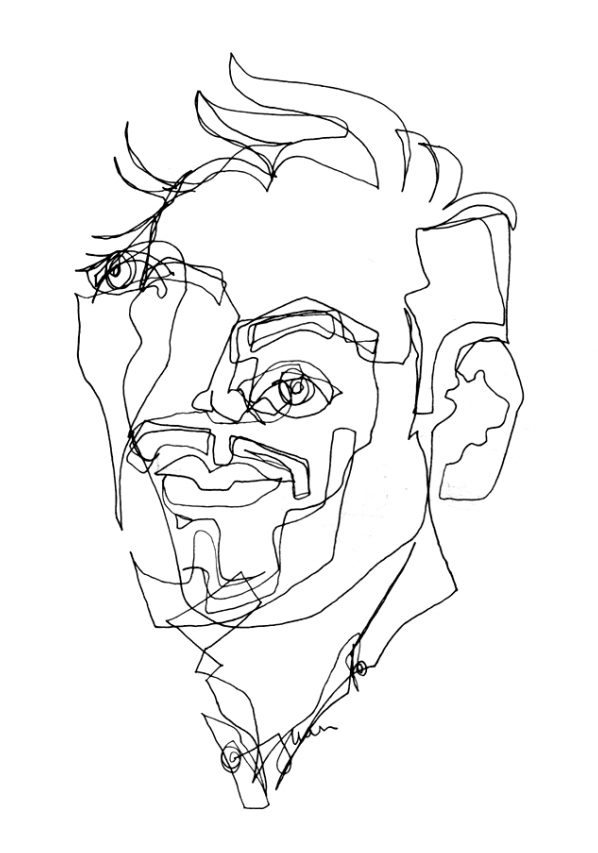
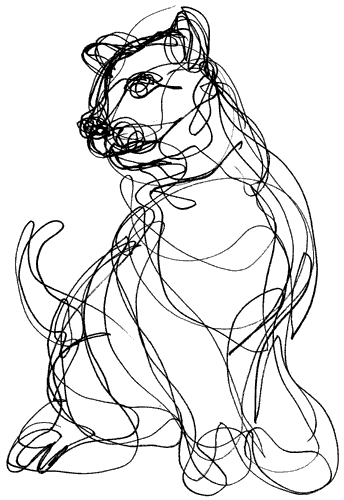
Blind contour drawing is when you draw without looking at the paper and without lifting your pen off the page, so it's a drawing activity made out of one line.
The purpose of blind contour drawing is to improve your coordination between hands and eyes whilst becoming more observational as an artist.
It's a really easy, fun activity I love and it's ideal to do it with other, especially kids. Although it may not look like an aesthetic artwork like the others, its abstract design makes you feel like an artist, as blind contour drawing was used by Picasso.
How do you draw a blind contour?
All you need is paper and a pen. Firstly, the two rules are not to look at your paper and not lift your pen once it touches the paper. Start by looking at your subject, placing your pen on the surface, and drawing how you see them. Move slowly by your feeling and match the speed of your hand with your eye as you observe them.
7. Nature print art
A common and enjoyable art activity is using stencils or print. Moreover, using nature for it makes it more beautiful and professional-like so nature print does not look tacky.
What is nature print art?
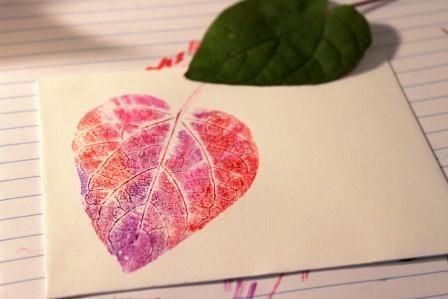
Nature print art involves the pressing of a painted object (such as a leaf) onto a surface to print the design and look onto the page.
What you need for nature print art:
- Leaves, twigs, flowers, or other plants. It's good to have a variety, especially leaves with different patterns.
- Paper, artbook, or canvas
- Paint with lots of different colours
How to make nature print art:
- Paint your leaf or chosen plant with the colour of paint you want.
- Next, put the leaf onto your paper with the print side facing down.
- Push down on the leaf and then remove it to see your print design.
- You can add more leaves or nature patterns and you are done.
As seen above, it's really easy to make. For more creative art, overlap the patterns and try using multiple colours on one leaf. I think it's a beautiful activity as the print makes gorgeous patterns and coming from nature makes it even more pretty. Though it's nicer to take leaves found on the ground rather than ripping them from trees.
8. 3D hand drawing
3D hand drawing is something I learned in art class and it looks really cool even though it's super easy. The result will amaze kids. All you need is white paper, a pen, a pencil, a ruler and an eraser. Here is how to make an optical illusion hand and 3D drawing effect.
How to make 3D hand drawings:
- Put your hand on the paper and trace your hand with the pencil. Then, remove your hand.
- Using a pen and starting from the bottom of the paper, draw evenly spaced out horizontal lines and when you get to the outline of your hand, curve it up a bit in an arch within the outline of your hand. When you meet them outside of your hand outline, continue the horizontal line. It's helpful to use a ruler. Do this all the way up the page with roughly 1cm between each line.
- For a nice clean finish, erase the pencil line of your hand with a rubber.
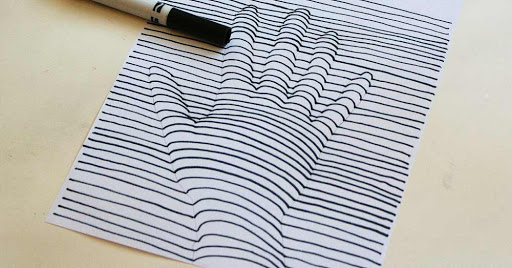
To make it more creative, try using different colours or putting your hand into different poses. It also doesn't have to be a pen, you can use a marker to make it stand out. Additionally, you can use this 3D illusion effect with other objects such as a flower.
9. Scribble art
Scribble art is very fun, easy, and cheap. Although it can be hard for it to look very professional, the process is fun and easy for kids. All you need for scribble art is paper and a pencil or pen. Scribble art is considered abstract art as it does not realistically show the subject but uses lines and forms differently.
How to do scribble art for kids:
- Start by drawing a random scribble onto paper.
- Next, think about what the scribble might look like.
- Complete the drawing with more lines and scribbles to make it look like what you want it to be.
The simple, child version is great with colour - using crayons, coloured markers, and more for lines or colouring within the lines makes it enjoyable. Kids especially have fun making abstract scribble art as they can do whatever they want.
Or you can do the more known and professional version with just a black pen, pencil, or fine liner for a sophisticated look. And you can take it a step further by planning out what you want to draw. It can be as simple as a tree or dog to something complex like a portrait.
How to make a scribble portrait:
- Using a pencil, sketch out the person's face.
- With a pen, use scribbles to go over the outline and add details and shading with more scribbles.
- Erase the pencil markings with rubber for a clean finish.
If you thought scribbles were a kid's messy doodle that didn't look good, think again - you can make fantastic art with scribbles. I also find that it looks best if you don't have a clear face outline but rather use scribbles for the edge so it creates that nice look.
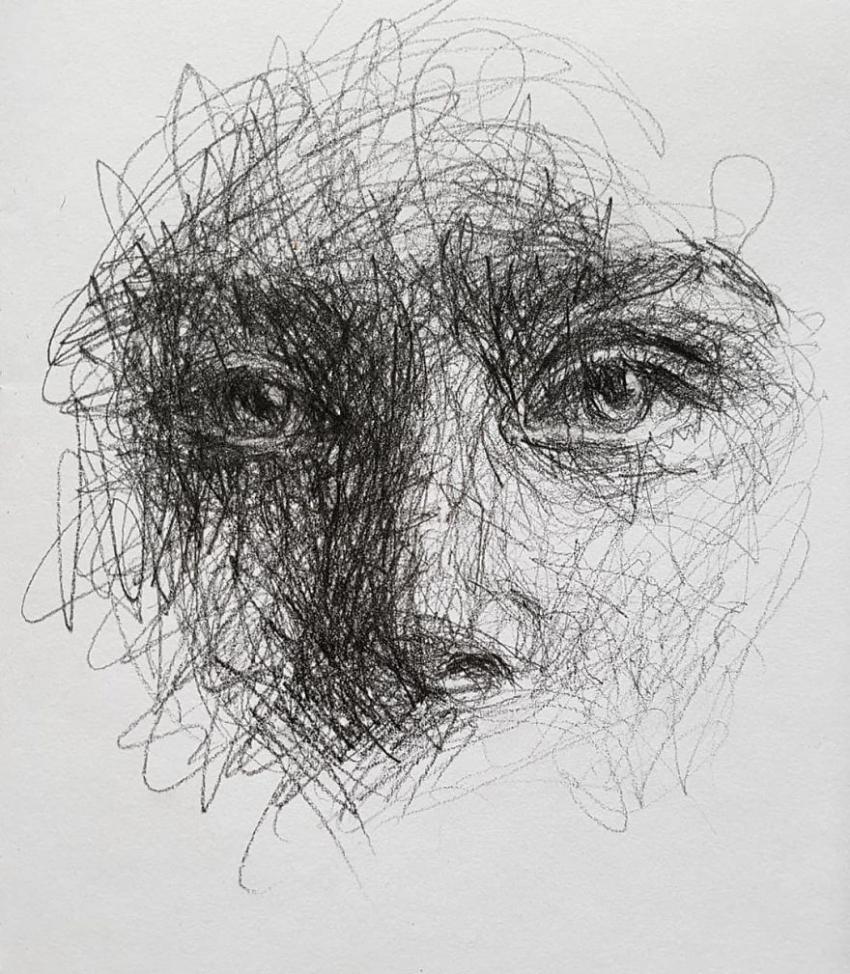
Furthermore, it's a great project to do alone and if you're an adult. It helps you relax, concentrate and pass the time as you focus on how to make it look really good. With effort, it can seem like an artist made it and you can proudly hang it on your wall. Not only that, but it also strengthens your creativity.
10. Rock Painting
A popular art idea seen on Pinterest is painting rocks. It's extremely easy, cheap and great for all ages. They can look really cute or aesthetic and make your house more beautiful. All you need is paint and rocks.
What kind of paint do you use on rocks? You should use acrylic paint on rocks for the best results.
How to start painting rocks:
Firstly, paint your rock in the base colour of your choice, maybe doing 2 or 3 coats if you want a strong, smooth colour without seeing the rock. When it's dry, paint whatever you want on top.
Alternatively, you can use Sharpies or paint pens as they work well instead of painting on rocks. But, I think it might be good to put a few layers on so it lasts longer and is stronger or you can paint it with white glue as the base so it's clearer when you draw or write on top.
Furthermore, you can use clear nail polish to seal painted rocks. Once the paint is dry, you can paint it with clear nail polish for a shiny look and a smooth feel.
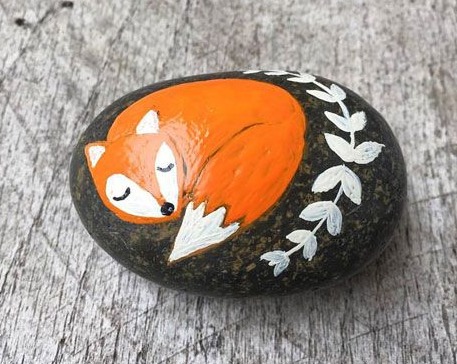
However, painting rocks may be worse if you use toxic paints and leave them in the soil. Therefore, you should leave them away from nature and pets so that animals don't lick them and it doesn't affect the soil. You also shouldn't take rocks from private property; instead, take rocks that you have in your garden.
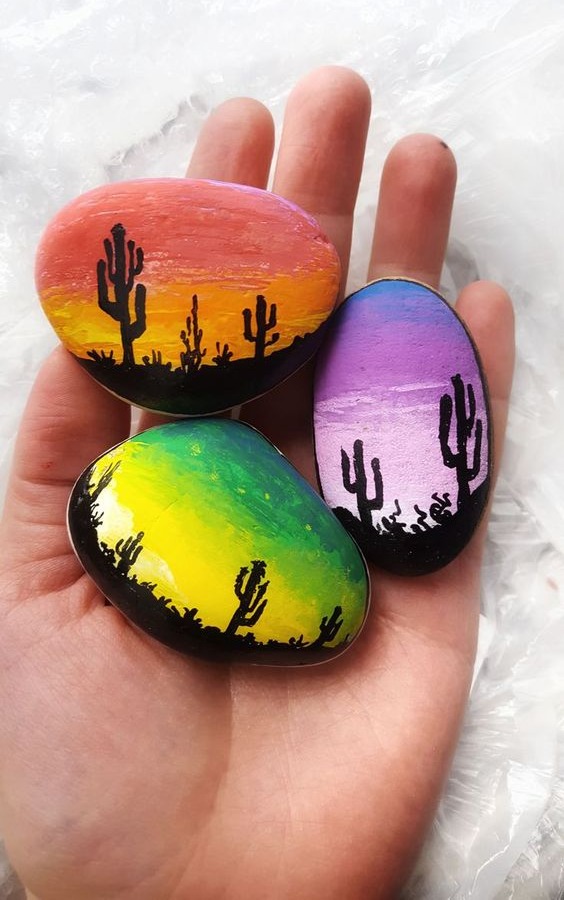
The perfect place to put your painted rocks is on your desk as decoration. Especially if you make many with the same theme or colours that go with your desk or wall colours, it'll look aesthetic.
Some great rock painting ideas are cute animals, simple nature like a flower or a tree, the sky or sunset, your favourite fictional characters or object, and writing a quote. You can look up simple images for references of what to draw if you want to copy a picture, such as a Harry Potter design.
Why should you make art?
The benefits of art activities are that it's one of the best ways to get creative and use your imagination and this is especially good for kids. Likewise, it's a fun activity to do when you're bored and with some easy and simple ideas, it can be really cheap.
Remember, art is limitless and so are your ideas - you can find inspiration around you wherever you are. Furthermore, you can mix different mediums together and art techniques, such as watercolour on tape art; cutting up your watercolour for a collage, or drawing on your pulled string art.
So, enjoy art with others or by yourself and be amazed by the creations you can make. You never know how it'll turn out until you try and these can make you feel proud like a professional artist.
