A Complete Guide To The Menstrual Cup
The 5-7 days of a woman's menstrual cycle is undoubtedly the most difficult and inconvenient days of her life. Over the years, several companies have come out with products to help women with their discomfort on these challenging days. One such innovation was the menstrual cup.
The menstrual cup is a small funnel-shaped synthetic rubber or silicone cup that is inserted into the vagina to collect menstrual fluid.
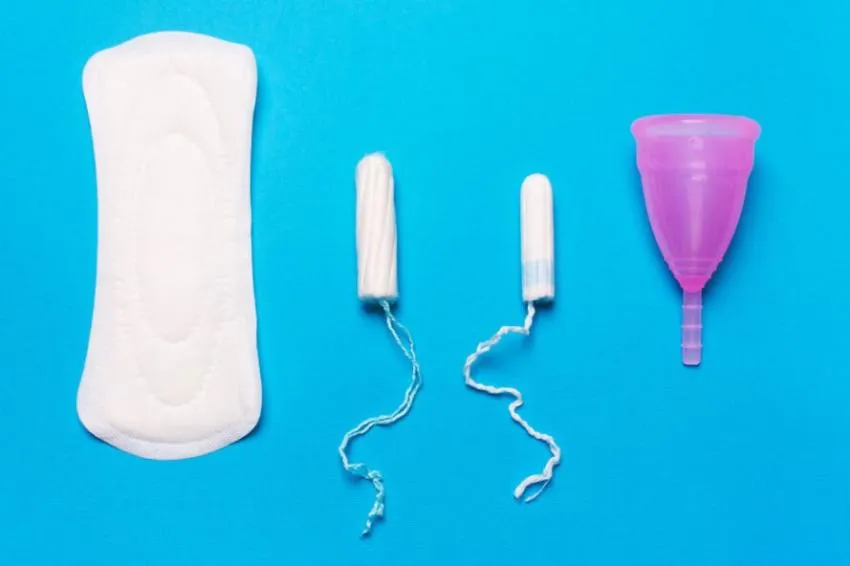
The cups are reusable and last a very long time, making them the perfect eco-friendly alternative to traditional feminine hygiene products such as pads and tampons.
The menstrual cup is not a recent innovation. The earliest version of the cup was made as early as 1932 using rubber. However, it was not a commercial success. Later in 2001, the first silicone cup was introduced by UK-based Mooncup and has now become popular all over the world. Today, almost all the menstrual cups in the market are made using medical-grade silicone due to their durability and hypoallergenic properties.
Why you should start using a menstrual cup right away!
There are several benefits for why you should start using a menstrual cup. Some of the top reasons include:
1. It is pocket friendly
Menstrual products are a necessity for women. We cannot function normally without them. Unfortunately, this biological function has proven to be an expensive affair.
A single pad can cost anywhere between $0.3 to $1 per piece depending on the brand. On average, a woman would use around 3-4 pads a day, for 4-5 days depending on her flow. Assuming that a single pad costs around $0.6, she would have spent over $4,700 in a span of 30-33 years. Now, that is pricey!

A menstrual cup on the other hand costs only between $10 to $40 a cup and can last up to 10 years with proper care (although it is recommended to change it every 4-5 years). Overall, you'd be spending only 0.04% of the $4,700 that is otherwise spent on menstrual hygiene products.
2. It is an eco-friendly option
Conventional pads and tampons are made using polyethylene plastics and other chemicals that take decades to decompose. Given the number of years a woman has her period, she can generate up to 130-kilo grams of non-biodegradable waste with each pad or tampon taking between 500 to 800 years to decompose. Now, multiply that into an entire population of menstruating women and we have a real environmental hazard on our hands and an ever-growing carbon footprint.
Although several alternatives have come out such as cotton pads, cloth pads, and so on, they still require cotton which is a very thirsty crop. Silicone menstrual cups, on the other hand, are made using a type of sand called silica which degrades and goes back to its original state in the earth's crust. So, by switching to the cup, a woman can save the environment from plastic waste generated by over 2400 pads.
3. Holds more fluid than traditional pads and tampons
A menstrual cup can hold up to 30ml of fluid which is two times more than a conventional tampon or pad. This makes it perfect for long days with limited opportunities to change.

4. It is convenient and can be worn for up to 12 hours
Since the cup can hold a lot more fluid than the usual tampons and pads, it is much more convenient. A pad or a tampon will have to be changed every few hours depending on the flow in a day. Not changing it on time can lead to leakage and odor among other inconveniences.
A menstrual cup can be worn safely for up to 12 hours and will have to be emptied only when it fills up. In addition to this, the menstrual cup creates suction inside the vaginal canal and collects the blood which ensures that there is no leakage.

5. It is comfortable
One of the biggest hassles of wearing a pad is rashes and chaffing which causes great discomfort on an already difficult day.
On heavy flow days, you'll find yourself sitting on a wet, soggy pad and towards the end of the cycle, you could experience dryness and irritation resulting from a lack of lubrication.
There won't be any such issues with the cup because once it is properly inserted, you'll feel nothing at all and may even forget that you're on your period! You could also enjoy your favorite outfits without worrying about any bulging or leakage.
6. It is safer than pads and tampons
Conventional pads and tampons are made using several chemicals such as styrene, chloroform, and acetone among others. The pads are also bleached using chlorine to give them a white, clean look which results in the production of dioxin, a highly toxic chemical.
According to a study published in Reproductive Toxicology, as pads are in direct contact with genitalia for prolonged periods of time, there is a possibility that a considerable amount of these chemicals can be absorbed into the reproductive system.
In addition to this, tampons and pads worn for a long time, in rare circumstances can cause toxic shock syndrome.
Cups are perfectly safe as long as you keep them clean. It can also be worn safely for up to 12 hours and since it just collects the blood and does not absorb anything, there is no risk of infection.
Structure of the menstrual cup
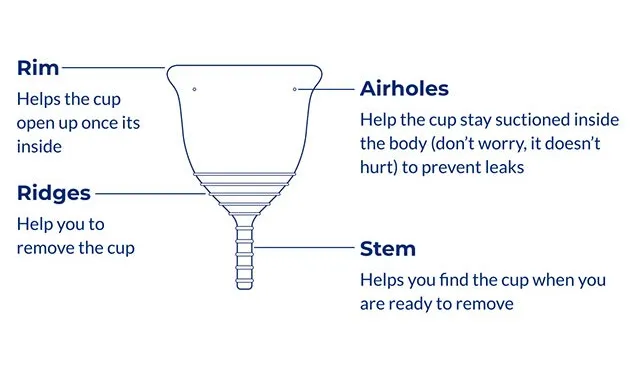
The menstrual cup is very easy to use once you get the hang of it. It is a small and flexible funnel-shaped object which consists of a rim and airholes that help the cup open and stay suctioned inside the body to prevent leaks. It also has a stem and ridges at the bottom which helps you find the cup and eases the process of removal.
How to choose the right cup for you
Today, menstrual cups come in different shapes and sizes. Some of them can also vary in composition and feel. Here are some of the factors to consider while choosing a cup.
1. Your Age helps in deciding the size of the menstrual cup you should use
Most menstrual cup companies create 2-3 standard sizes. This may range anywhere from small to large based on the diameter and holding capacity of the cup. Usually, while purchasing a cup, you will be required to select one based on your age.
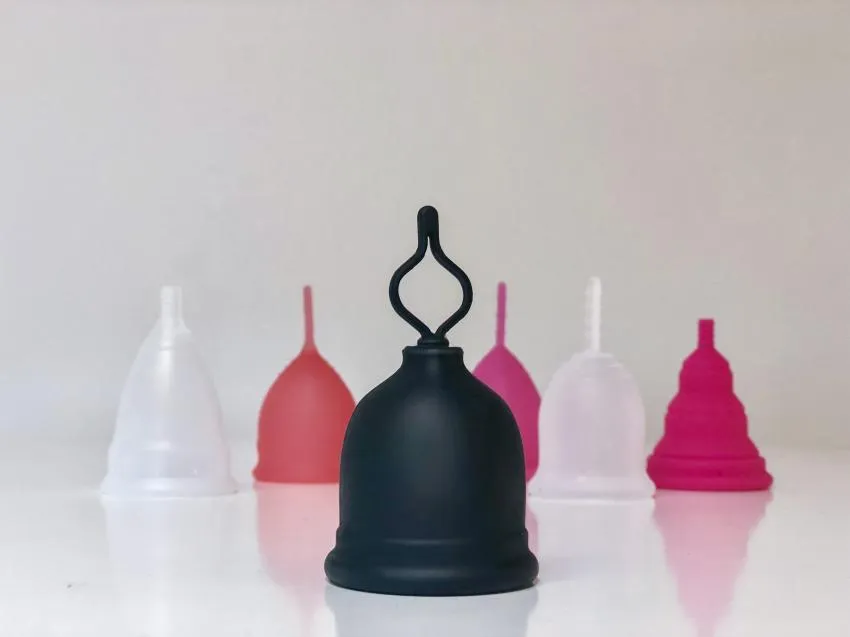
Small or medium cups are ideal for younger women below the age of 30 or for those who have not given birth yet. Larger cups are best suited for women above the age of 30 or who have given birth. This information can be found on the package of your cup.
The idea behind this is that younger women usually have tighter and stronger vaginal muscles which can accommodate a small cup and effectively create a suction. Older women or women who have given birth tend to have weaker vaginal muscles and hence are advised to use a larger cup for best results.
However, this is not always true as every woman's body is different and sometimes a smaller cup could work very well for women over 30 or even those who have given birth. Some companies have gone on to include extra small sizes that can be used by young teenagers as well.
2. Location of your cervix
The height and location of your cervix are some of the most important factors to consider when choosing a cup. The process could be a little awkward but it really helps understand what kind of cup would work best for you. Make sure that you do this during your period when the cervix is at the lowest.
To locate and measure the cervix, stand up and put one leg on the edge of the bathtub or a counter (you could even squat down) and insert a clean finger into your vagina until you can feel your cervix. The feel of a cervix is often described as a pointed tip like the tip of your nose or even a round marble. Basically, If you feel anything different than the rest of your vaginal canal, that is most probably your cervix.
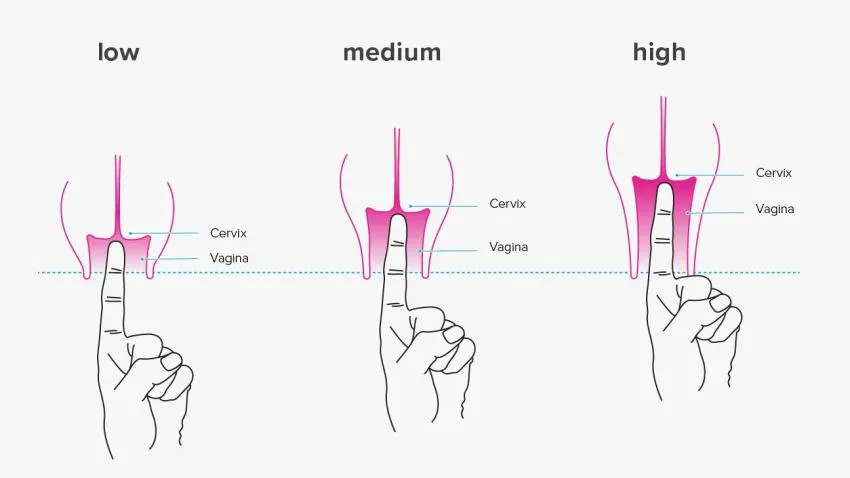
If you find that your finger is inserted all the way in and you're still unable to feel your cervix, it means that your cervix is high. In this case, a longer cup such as the Lily Cup would be ideal.
If you can feel your cervix when your finger is inserted up to the middle of the second knuckle, it means that you have a medium cervix. Most of the cups in the market would be ideal in this case.
Finally, if you can feel your cervix when your finger is barely inside or at the first knuckle (refer to image), you most likely have a low cervix. Shorter cups such as the Lena Cup and the Lunette Cup would be great options to choose from. The video below will give you a better understanding of the measurement process.
3. Understand your flow
Understanding your flow can be very handy in determining the size of the cup that would work best for you. If you use a super-absorbent tampon with a 14ml absorbency rating and have to change it every 3-4 hours, you can choose a cup with a 25-28ml capacity which can be used for approximately 6-8 hours.

If you are a pad user, it could be slightly challenging to make an exact measurement since they mostly do not carry any absorbency ratings. In this case, it is best to use your instincts and make a choice based on how often you have to change your pad.
4. Firmness of the cup
Cups are usually soft and flexible objects. However, some are more firm than others. If you suffer from incontinence or any bladder issues, it is best to avoid firm cups or cups with prominent rims as they can put pressure on your bladder and make you feel the constant need to pee. Hence, in general, it is advised to go with a softer cup.
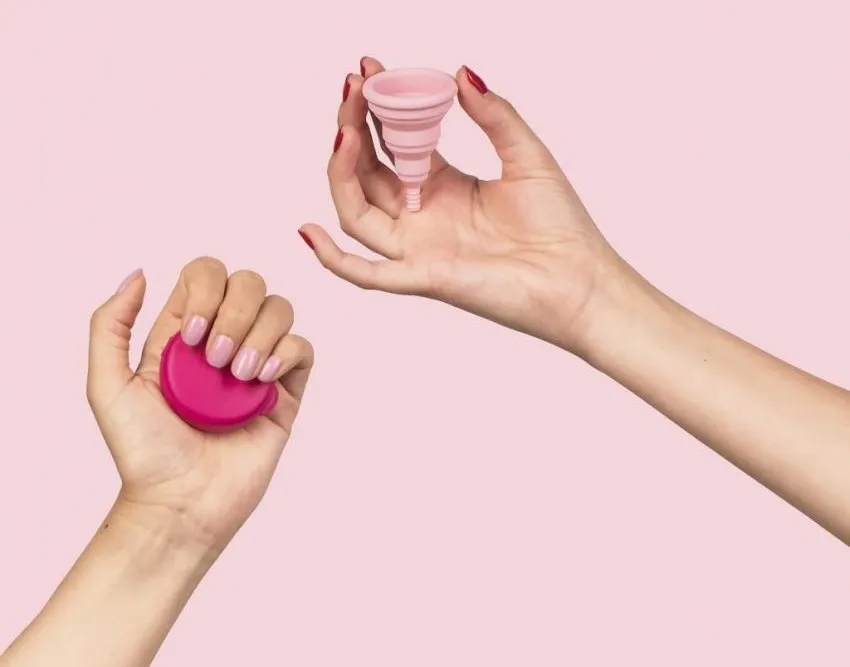
If you are physically active and have strong pelvic and vaginal muscles, a firmer cup would be ideal as it can hold its shape better. A soft cup in this case may not be able to remain open against the strong walls of the vaginal canal and can cause the suction to break, resulting in leakage.
5. Type of stem
Today cups are made with different stems. They could have simple stems, stems with rides, rings, or bobs; while some may not have stems at all.
If you're a beginner or someone with a high cervix, it is advised that you choose a cup with a stem as it can help you locate the cup easily when it is inside you. Additionally, a stem with ridges or a ring can give you a better grip while trying to remove it.
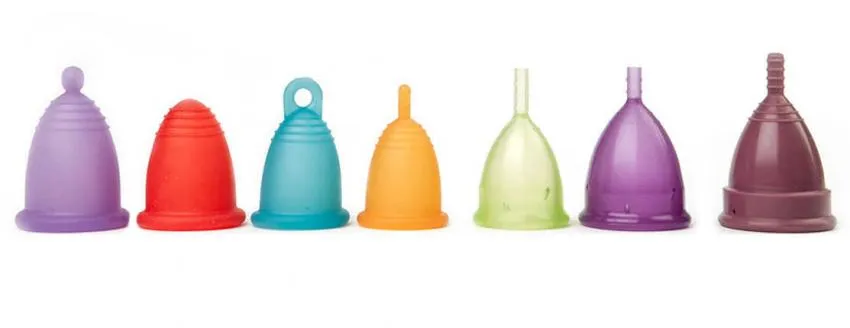
If you find your cup's stem to be too long, you can easily just snip it off up to where you'd like it to be. As you get more comfortable with using the cup, you can opt for ones with no stems as well.
6. Quality of the cup
Make sure that you choose a cup from a good brand that makes use of good quality, medical-grade silicone. Refrain from purchasing cheap products and knock-offs from websites such as Amazon as they could be of inferior quality and can cause health issues.
How to use the menstrual cup - A step-by-step guide.
Before you handle the cup in any way, it is important to ensure that your hands are clean.
Step 1: Sterilize the menstrual cup
- Fill a large bowl (bigger than the cup) with water and immerse the cup in it.
- Make sure that the cup is completely submerged in the water.
- Bring the water to a boil and let the cup boil for about 5 minutes, making sure that it doesn't hit the base of the bowl.
- Remove the menstrual cup from the water and place it on a clean towel and let it dry. Your cup is now ready to use.
You don't have to sterilize your cup every day of your cycle but you must sterilize it after completion of each cycle.
Step 2: Fold the cup
Make sure that you rinse your cup before it is folded and inserted into the vagina. Don't dry it as water is a great natural lubricant. There are several folds that you can try and find the one that works best for you.
The 4 most common and beginner-friendly folds are:
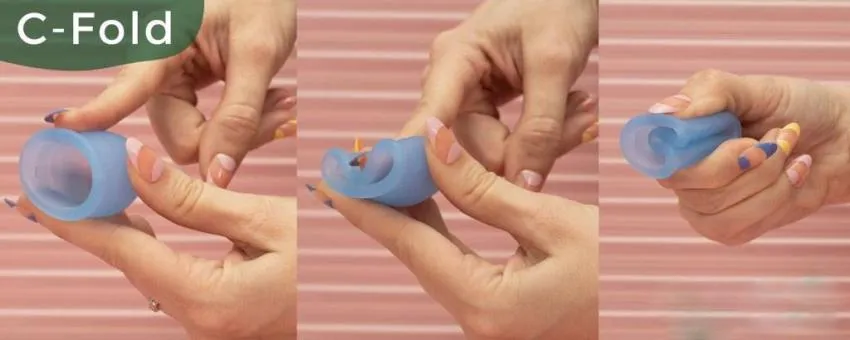
1. The C fold / U fold
This is one of the most popular and easiest folds. However, its biggest drawback is that it is one of the widest at the point of insertion and can tend to open very early on during insertion, especially if you're new to using the cup.
To make the fold, hold your cup and press it together to close the mouth. Then, fold it together vertically so that the ends of the mouth meet to form a C shape or a U shape.
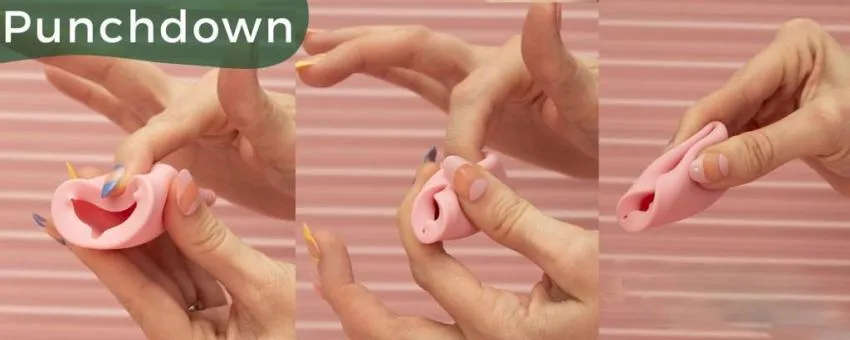
2. The punch down fold
This is another very popular fold especially among beginners as it has the smallest point of insertion.
To make the fold, hold your cup in your hand. Place the index finger of your free hand on the rim and push it down. Keeping the index finger in the same position, pinch the cup together using your free hand and hold.
Once you insert the cup, give the protruding base a push to help it open up inside.
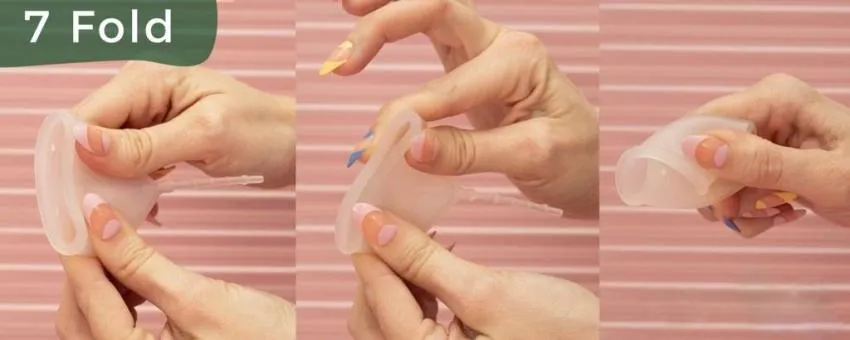
3. The 7 fold
To make this fold, hold the cup and press the mouth closed. Using your freehand, fold one end of the mouth diagonally to the base of the cup and hold. This will form the shape of a 7.
This fold creates a fairly small point of insertion and could work well for beginners. It also pops open easily once inserted.
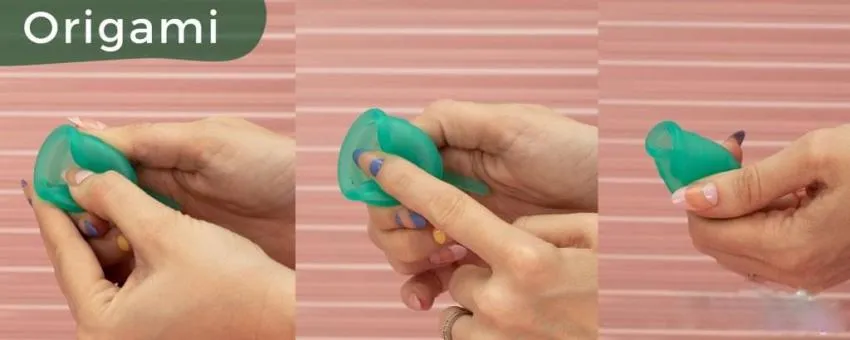
4. The origami fold
This fold has the best of both the punch down and the 7 folds. It has a small point of insertion much like the punch down fold and can easily open up after insertion like the 7 fold.
To make this fold, hold your cup and place your index finger on the rim. Push the rim down halfway (not as far down as the punch down fold). Then, fold the right end of the mouth diagonally to the base of the left end. The end result will look something like a small rosebud.
There are several other folds in addition to these which you can try and find what works best for you. Here is a video demonstrating 9 different folds including the 4 mentioned above for you to try.
Step 3: Insert the cup
Inserting the cup can be a very intimidating and awkward process at first. But with practice, it can be done in less than 3-5 minutes.
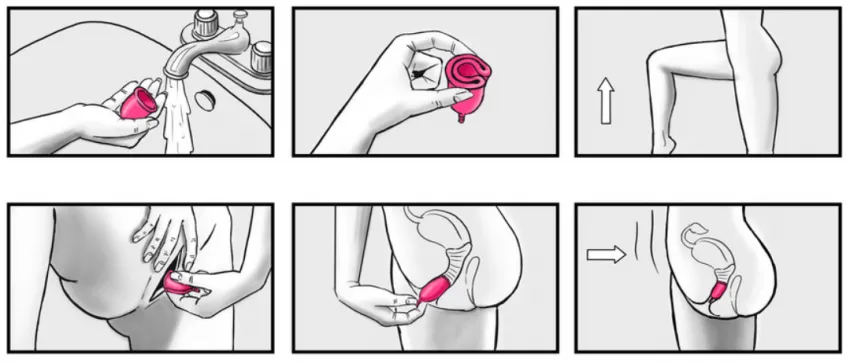
To insert the cup, stand with one leg on a ledge in the shower, fold the cup, and carefully insert it into your vagina. Alternatively, you could squat down on the floor and insert it as it provides greater accessibility.
While inserting the cup make sure that you're inserting it at an angle towards your spine because your cervix is positioned at an angle inside your body. Do not insert it straight upward because it will not open up correctly and can cause discomfort and leakage. Once the cup is inside, hold the stem and twist or adjust it till you feel it open up.
To check if the cup has opened up properly, insert a clean finger into your vagina and feel for the base of the cup. Run your finger around the base and make sure that there are no folds or bends. If you do feel any folds, hold the stem of the cup and gently twist the cup till it opens up completely. Some people may even hear a "pop" sound when the cup opens up inside although this is not always true.
Finally, you can also give the stem of the cup a gentle tug to ensure that suction has been created. If you feel some resistance, then it most likely means that the cup is fully open and secure. The video demonstration below can give you better visual clarity.
Step 3: Remove the cup
Removing the cup can be a scary endeavor for a beginner. But the most important thing to remember is to stay calm and relaxed. If you stress and panic, your vaginal muscles are most probably going to tense up, and getting the cup out is going to be a challenge.

There are several ways in which you can position yourself to remove the cup. However, from personal experience, the best method is to squat down on the floor and remove it. Alternatively, you could also stand with one leg on a chair or a ledge or even simply sit on the toilet (it's important to be careful in this case).
Once you're comfortable in your position, insert a clean finger into your vagina till you find the stem of your cup. Gently tug at the stem and shake the cup down slowly just to loosen the suction. Do not yank the cup out as it can cause pain and can also be very messy.
After you nudge the cup a little lower, feel for the base of the cup, and using your clean thumb and index finger, pinch the base and break the suction. Once this is done, you can easily remove the cup and empty its contents into the toilet. Here is a quick video to demonstrate the process.
Step 4: Clean and store the cup
Since the menstrual cup is an object that goes into your body, it is extremely important to keep it clean. The cleaning process can be split into 2 parts- during your cycle and after your cycle.
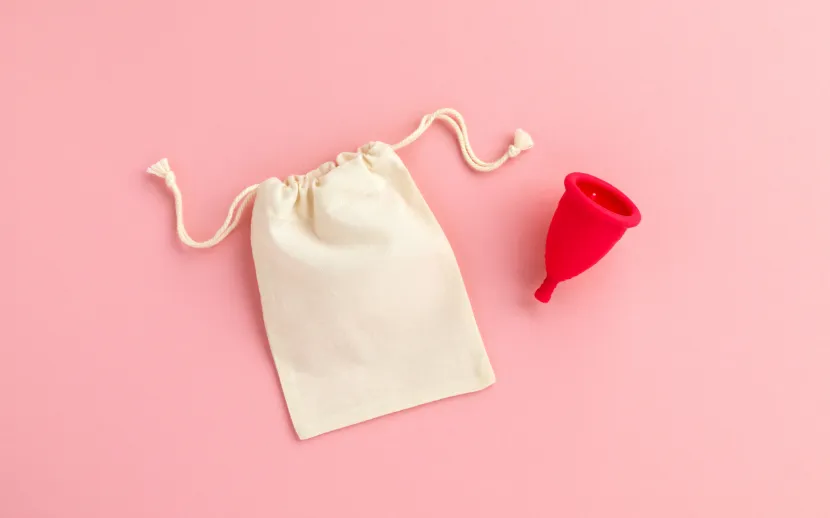
After the end of each cycle, it is important to sterilize your cup. To do this, clean your cup, immerse it in water and boil it for about 5 mins. Once that is done, remove it and place it on a clean, dry towel and leave it to air dry in a hygienic place. After the cup has dried, you can store it in a cloth pouch which often accompanies the product.
Sterilization is not necessary for every single day of your cycle. You can simply remove your cup, rinse it under running water and wash it using vagina-friendly soap or an intimate hygiene cleanser. Several companies have also come out with cup cleaners but it is not really a necessity. If you don't want to use any sort of soap on your cup, you can also just give it a plain wash using warm water and use it again.
Menstrual cup hacks you must know.
Using a menstrual cup is not always a walk in the park. Here are a few hacks to help you through the process.
1. Beginners, wear panty liners
If you're a beginner, it is always best to take precautions and wear a panty liner until you're confident about your cup-wearing abilities. That way, even if you make mistakes, you can avoid any accidents. As you may know by now, the cup has a bit of a learning curve and this is a great way to encourage yourself to get through it without giving up.
2. Always keep a spare cup with you
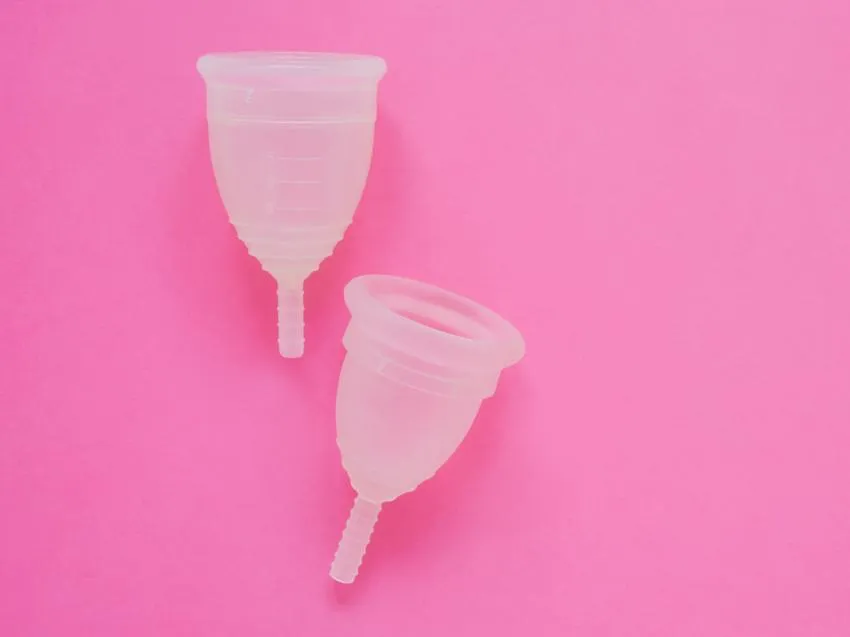
For convenience sake, it is best to buy 2 cups and keep one as a spare in case you drop one down the toilet. In fact, many companies have now started selling 2 cups in a value pack. So, the next time you see a pack of 2 cups, buy it. Because trust me, it does not feel good to wear a pad after getting used to a cup.
3. Use the right kind of lubrication if required
It is a common belief that oils such as coconut oil can be used as a lubricant to help insert the cup. However, it may not always be a good idea because some types of oil could damage the silicone of the cup. Some types of oils could also cause vaginal irritation. The best option is to use plain water or you could also go for a silicone-safe lubricant.
4. If your cup rides up, just push it out
If you have a high cervix, it is very likely for your cup to ride up your vaginal canal. If you're finding it difficult to find the stem of your cup, just squat down and stay in that position for about a minute and try to apply pressure and push your cup out like you would if you were giving birth.
5. Use a brush to get the residue off
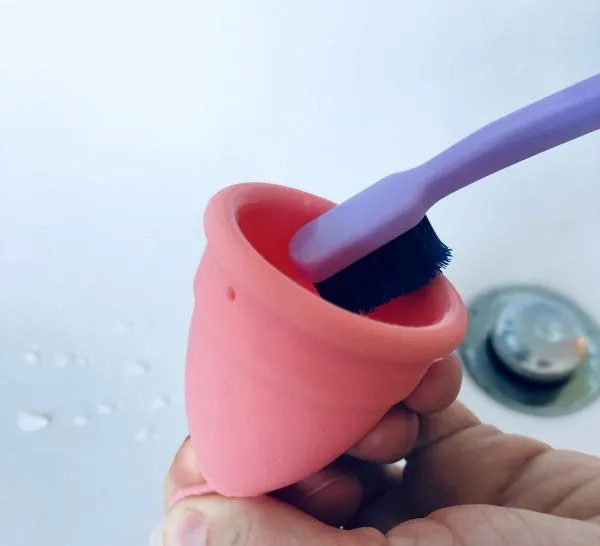
After prolonged use of a cup, there may be some amount of debris or residue left in between the crevices or ridges of the cup. Boiling and just using hands may not be effective. in this case, you can use a soft or medium bristle brush while cleaning to get the residue off.
6. Sterilize your cup in a whisk
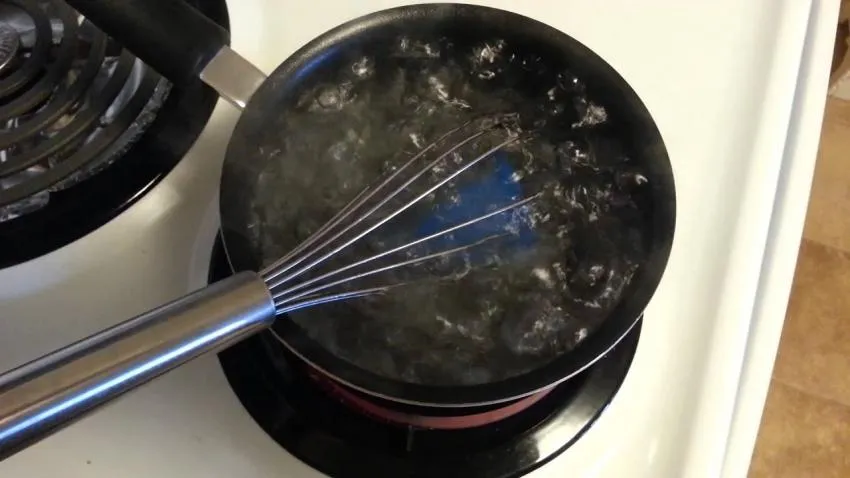
While boiling your cup during sterilization, make sure that your cup doesn't sink down to the bottom of the pot. A great way to avoid this issue is to fold your cup and put it into a whisk and then immerse it in the water to boil.
7. Sterilizing your cup in a hotel or a dorm
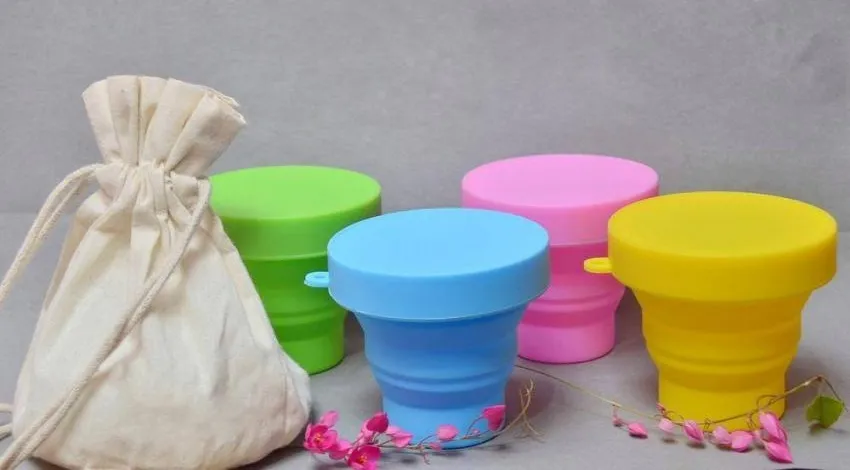
If you're staying at a hotel for a long vacation or if you're a student living in a dorm room, you most probably won't have access to a stovetop to sterilize your cup. But don't fret, you can still sterilize it and all you need is a kettle to boil water. Alternatively, you can also boil the water in a microwave.
Once the water has boiled, place the cup in a container and pour the boiling water onto it and let it sit there for about 5-6 minutes. You could also use a spoon to move the cup around. Several cup companies have also introduced foldable cup holders in which this can be done.
8. Cleaning your cup in a public washroom
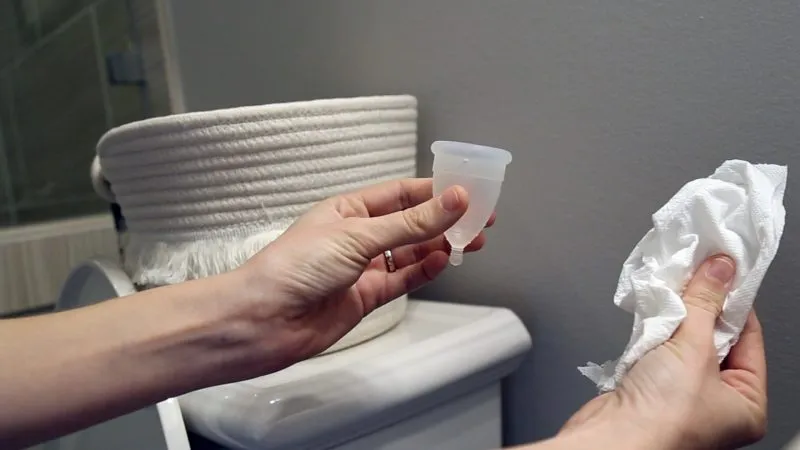
Removing your cup and cleaning it in a public washroom can be challenging. If your cup is full, make sure that you remove the cup while sitting on the toilet so that if anything overflows, it will fall directly into the pot. Once you have emptied the contents of the cup, use a sanitizing wet wipe or a plain tissue to clean the cup and put it back in.
9. Removing stains on the cup
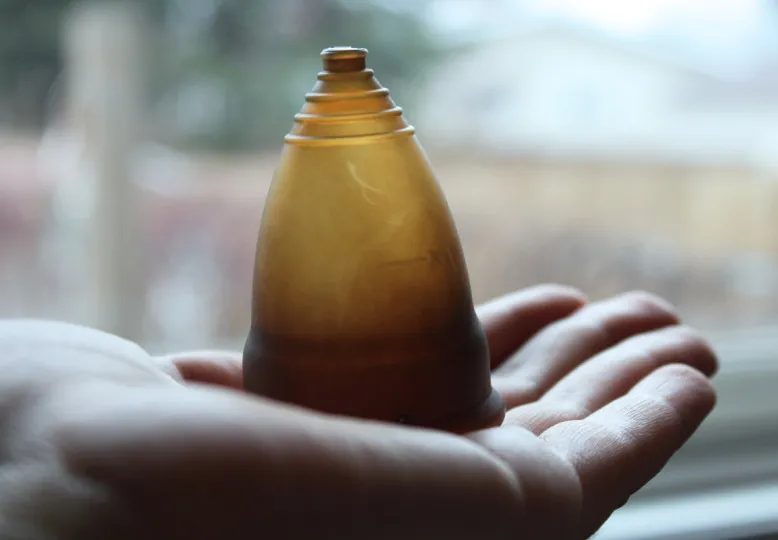
A menstrual cup can get stained after prolonged use and maybe more prominent in lighter cups. Ideally, you could just change your cup. Use this trick to remove stains only if you absolutely must.
Fill half of a container with hydrogen peroxide and the remaining half with water. Immerse your cup in this solution and let it soak overnight or for 7 hours. Your cup will be as good as new!
Menstrual Cup myths busted
There have been several myths surrounding the menstrual cup especially since it is something that goes into your body. So, here are some of the most common myths busted.
1. Cups cannot be used by virgins
The cup has nothing to do with a woman's virginity. In several cultures, virginity is associated with the intactness of the hymen. However, it is important to note that a person loses their virginity only if they participate in sexual intercourse. Also, the hymen can break for several reasons including strenuous physical activity. A menstrual cup may stretch the hymen but it is unlikely to break.
2. A menstrual cup can get lost inside the vagina
This is absolutely not true. Once your cup is inside, it has absolutely nowhere else to go except for out. Thanks to your body's anatomy and gravity, the cup will have no way to make its way into your body and get lost. In case your cup does ride up, just squat down and literally "birth it out"
3. You have to remove your cup each time you use the washroom
There is no need for this. The cup, if worn correctly will create suction and sit perfectly inside your vaginal canal and will not come out unless you manually remove it.
4. You cannot exercise or swim wearing a cup
You can do absolutely anything wearing a cup. When it is placed correctly and if the suction is not broken, there is no risk of leakage and is extremely comfortable.
5. Someone with a heavy flow cannot wear a menstrual cup
The menstrual cup can hold twice the amount of liquid that ca tampon or pad can, making it ideal for women with any type of flow. If your flow is heavy, you may just have to empty your cup more frequently than others.
6. Menstrual Cups cause pain
If your menstrual cup is worn correctly, you will have no pain whatsoever. In fact, you won't even feel it is in there and may even forget that you're on your period.
To sum up, the menstrual cup is a wonderful innovation and if you've been on the fence about trying it, just know that there is nothing to worry about. It is a very safe, convenient, and super comfortable product that can make your period a lot better. Although it is a little intimidating at first, once you start using it and get used to it, there is absolutely no going back.
Opinions and Perspectives
Really glad the article addressed the virginity myth. That stops so many young people from trying cups.
Fascinating how something invented in 1932 is finally getting the recognition it deserves.
Started using one to reduce waste but stayed for the convenience. Total game changer.
My teenage daughter wants to try one. Glad to see the article mentions cups for younger users.
Found the cervix measuring part awkward but it really helped me choose the right size.
The article's cost breakdown really puts things in perspective. Such a smart investment.
After six months of using a cup, I actually understand my cycle better than ever before.
Never knew about the whisk trick for boiling. That's going to make sterilizing so much easier!
The part about different stems is so important. Wish I'd known that before buying my first cup.
Getting the right fold makes such a difference. Tried them all before finding what worked for me.
Sterilizing in a hotel using just a kettle is brilliant. Perfect for traveling!
Great tip about using silicone-safe lubricant. Coconut oil definitely affected the material of my first cup.
Anyone else find it empowering to understand their body better through using a cup?
The cleaning routine seemed daunting at first but now it's just part of my normal routine.
Finally tried one after reading this article and wow, what a difference! Can't believe I waited so long.
Interesting point about the firmness affecting comfort. Makes sense why some people have such different experiences.
My periods are so much less stressful now. No more midnight runs to the store for supplies!
The part about different stems is helpful. I cut mine completely off and it works better for me.
Sometimes I forget I'm wearing it during my period. Never had that experience with pads or tampons!
Love how detailed this guide is about choosing the right cup. Helped me understand why my first one didn't work out.
Getting the right size is crucial. Wish I'd known about measuring cervix height before buying my first one.
I'm amazed at how little waste I produce now during my period. Feel good about not adding to landfills anymore.
The stem with ridges definitely helps with removal. Learned that the hard way with my first smooth-stemmed cup.
Love how the article addresses myths. The one about cups getting lost inside always makes me laugh.
I started with a cup that was too firm and could feel it pressing on my bladder. Switched to a softer one and problem solved!
Not mentioned in the article but I found squatting really helps with insertion and removal.
Using hydrogen peroxide to remove stains is such a helpful tip. My clear cup was starting to look a bit dodgy.
Taking it out was scary at first but now it's second nature. Just remember to break the seal first!
Just ordered my first cup after reading this. Nervous but excited to try something new.
I was skeptical about swimming with it but it works perfectly. No more sitting out pool days!
My cramps actually decreased after switching to a cup. Anyone else experience this?
The tip about wearing liners while learning is smart. Wish I'd thought of that during my first month!
Been using cups for 2 years now and haven't had a single leak. Best decision ever.
Can't believe how many fold options there are. I've been using the C fold all this time not knowing there were easier ways.
The whisk trick for sterilizing is genius! Going to try that next time instead of chasing my cup around the pot.
I love my cup but wish someone had warned me about the learning curve before I started using it at work!
Anyone else surprised by how much money we spend on disposable products? The math in this article is eye-opening.
After reading about all the chemicals in pads and tampons, I'm definitely considering making the switch.
Learning curve is real but so worth it. Took me three cycles to get comfortable but now I literally forget I'm on my period.
The boiling part for sterilization freaks me out. What if someone walks in while I'm boiling my cup in the kitchen?
Totally normal! Just trim a little at a time until it feels comfortable. You can always cut more but can't add it back.
Is it normal to need to trim the stem? Mine feels too long but I'm scared to cut it.
Does anyone else feel proud about reducing their plastic waste by using a cup? My environmental impact feels so much better now.
Really appreciate the detailed folding instructions. Though I must say the origami fold looks complicated!
Interesting how they've been around since 1932 but only recently gained popularity.
Try rotating the cup 360 degrees after insertion. That usually helps create a proper seal for me.
I've been using mine for 6 months and still sometimes struggle with getting a good seal. Any tips?
The fact that they're safer than tampons regarding toxic shock syndrome really sold me on making the switch.
I found the stem on mine too long and was getting irritated until I learned you could trim it. Game changer!
Actually, public bathrooms aren't as tricky as you'd think. I just wipe mine with toilet paper and reinsert if I can't access a sink.
My sister swears by her cup but I'm worried about spills. How do you manage in public bathrooms?
The cost comparison really puts things in perspective. $4,700 vs a $30 cup that lasts years is mind-blowing.
Anyone else get grossed out by the idea of reusing the same product? I understand the benefits but can't get past that mental block.
I completely disagree about them being comfortable. I tried one for 2 months and could always feel it.
The part about cervix height measurement made me uncomfortable but I guess it's important for choosing the right size.
Seriously wish I'd known about cups years ago. Think about all the money I've wasted on disposables.
I appreciate how the article explains different fold techniques. The punch down fold worked best for me when I was learning.
As someone with a heavy flow, I love that it holds more fluid than tampons. No more hourly bathroom trips!
My biggest concern is the cleaning part, especially in public restrooms. Seems like it could get messy.
The article mentions cheap knockoffs on Amazon. Anyone have recommendations for trusted brands to buy from?
Not going to lie, it took me about 3 cycles to really get comfortable with insertion and removal. Now I'm a total pro and wouldn't go back to pads.
The environmental impact of traditional pads and tampons is shocking. I had no idea they took 500-800 years to decompose.
I'm really curious but nervous about trying one. Does it hurt to insert? I've only ever used pads.
I switched to a menstrual cup last year and it was honestly life-changing! The savings alone made it worth it for me.
