25 DIY Home Decor Ideas For Harry Potter Fans

"yer a wizard Harry !" This line changed a normal boy's life just as much as it changed ours. We have played Quidditch with harry, went to classes with Hermione, and visited Molly with Ron. So for the Potterhead in you, here we have a list of 15+ easy DIY home decor items inspired by Harry Potter and show your magical side.
1. DIY Wands
Everyone knows that wands are the foremost important thing in the harry potter universe. If you don't have a wand, you are practically a squib because you can't perform any magic. But we have got your back. Here is an easy tutorial by Becca beach to help you with your wand making.
For this DIY you are going to need the following items:
- Chopsticks
- Glue ***
- Brown paint
- Spiders to make it exotic
With these materials in hand, you can follow the following steps for your own personal wand:
- Spiral the glue from the glue *** around the chopstick. You can Stick a spider on the top or can transform it any way you want. No limit on creativity!
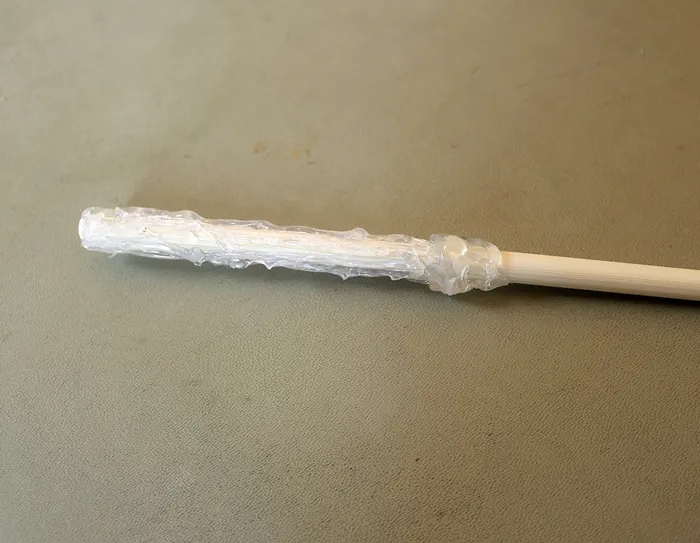
- Let the glue dry.
- Paint the wand with brown paint to give it an authentic wood lock.
Keep these wands in a vase and place it in the middle of your coffee table to show your magical side.
2. Flying Keys
I am sure everyone remembers that scene when enchanted keys were flying around the room and Harry just grabbed them to find out the real one.
Materials needed for this DIY are:
- Ornamental keys
- Craft Butterflies
- Glue
- Thin white string
With these materials, follow the steps for your own enchanted keys:
- Remove the wings from the craft butterflies
- Stick the wings on the keys' horizontally
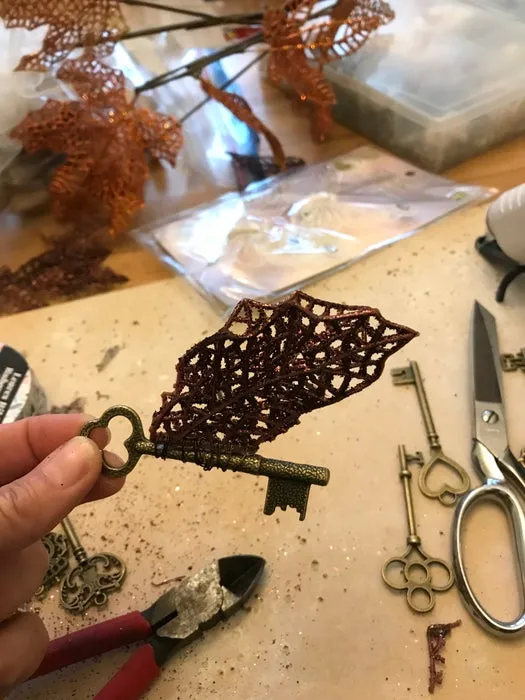
- Attach the string to the newly made keys.
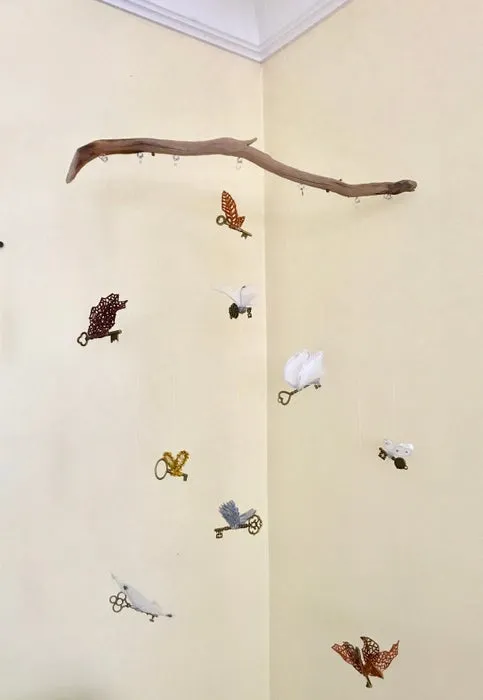
- Your keys are ready! Now you can hang these anywhere in your humble abode.
3. Lumos Nox Switchboard
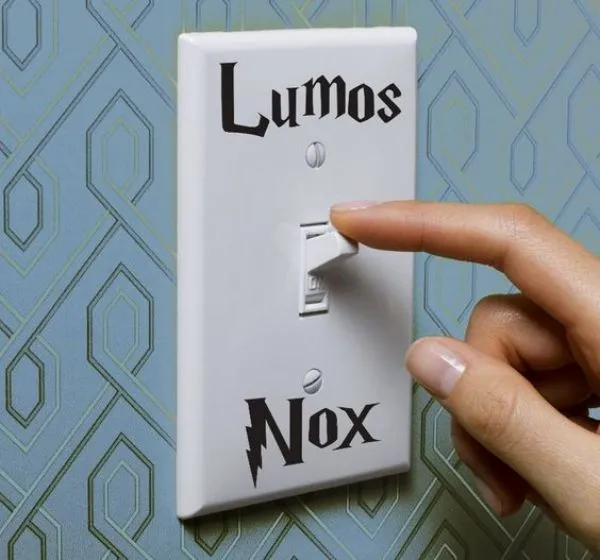
This DIY is the easiest one on the list. You just need a sharpie that is contrasting to your switchboard and you are done. With crafty penmanship, you can transform a plain-looking switchboard into a wizardry marvel. Don't forget to say Lumos when you turn on the switch.
4. Harry Potter Mural
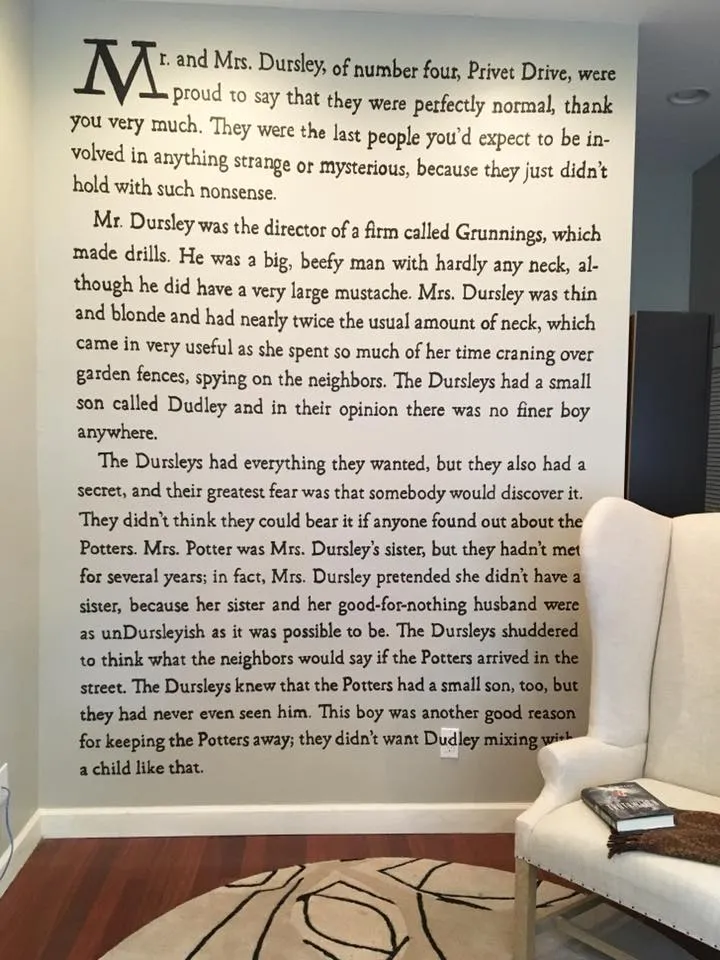
This is the best way to show your love for harry potter and also cover an entire wall at the same time. The answer is simple, You inscribe the first page of the sorcerer's stone on the wall. You don't even need some unusual things, just a painting brush and an adequate amount of black paint and you are good to go. This artwork is going to take some time but it is all worth it!
5. Harry Potter Inspired Plant Pot
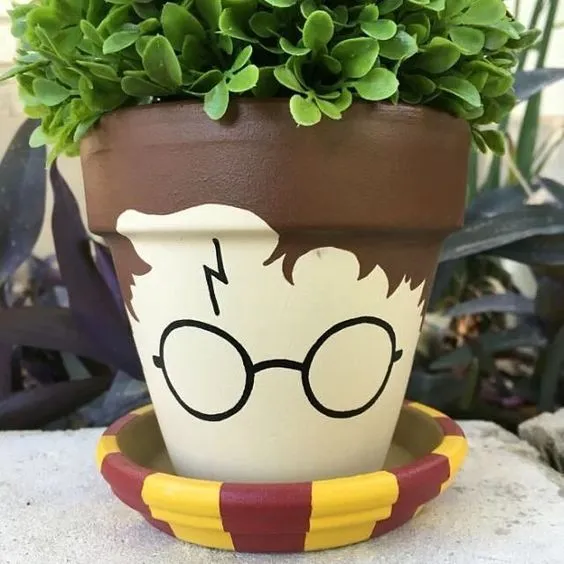
This harry potter themed plant pot is going to make heads turn. Attention to detail and a careful choice of colors is the secret to this incredible artwork and can make an impression on your guests. This DIY is the finest idea for coloring those houseplant pots. Clean oxygen and a harry potter artwork is an absolute win-win situation.
6. Hogwarts Floating Candles
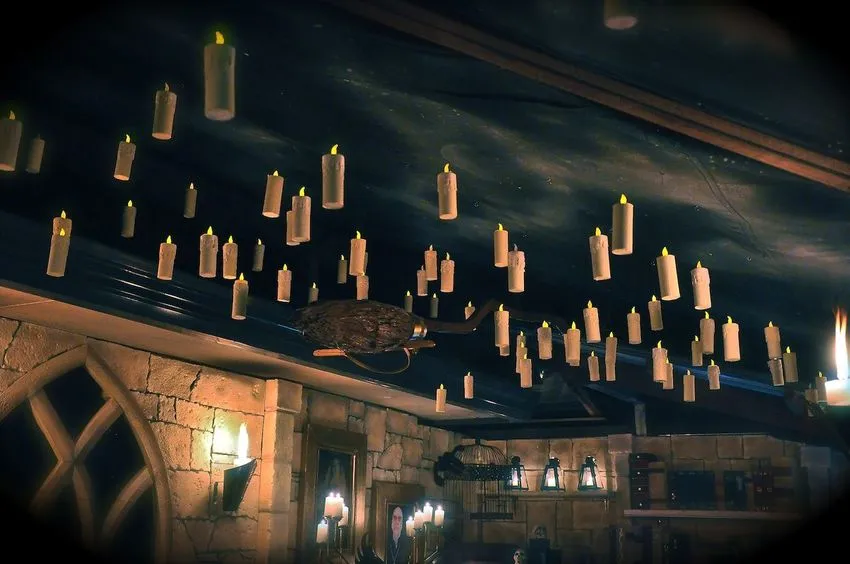
Harry entered the great hall and the first thing he noticed was there were floating candles! We all would have done the same thing because floating candles at night is a view to watch. This can be experienced in the comfort of your home also.
Materials needed for making this DIY are:
- Empty toilet paper roll
- White paint
- Fishing string
- Battery-powered tealight
- Glue ***
- Pushpins
With these materials in hand, let's move on to the next steps and start making the candle:
- The first step is creating a melting candle look on the toilet roll. Use a glue *** for the desired effect.
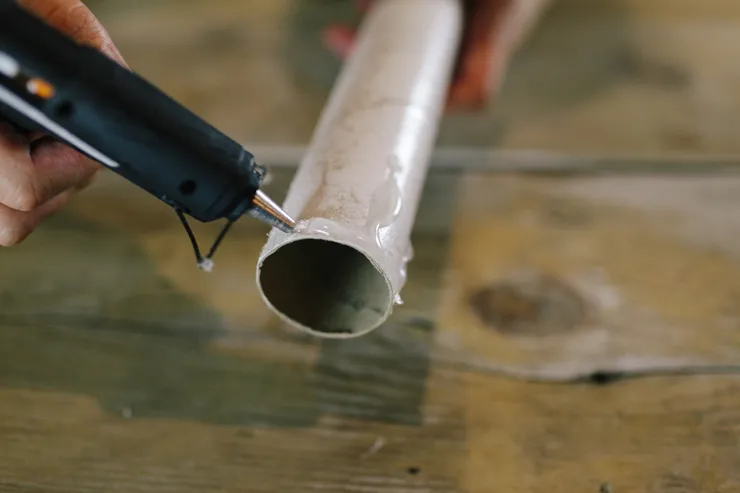
- The next step is painting your candle white. Use a paintbrush and cover your candle with white acrylic paint.
- Now a structure has to be created to hold the candle. Pin a hole on one side of the candle and one hole on the opposite side. Now thread your string from one hole and take it out from another and tie it up. You can now put your tealight in the structure.
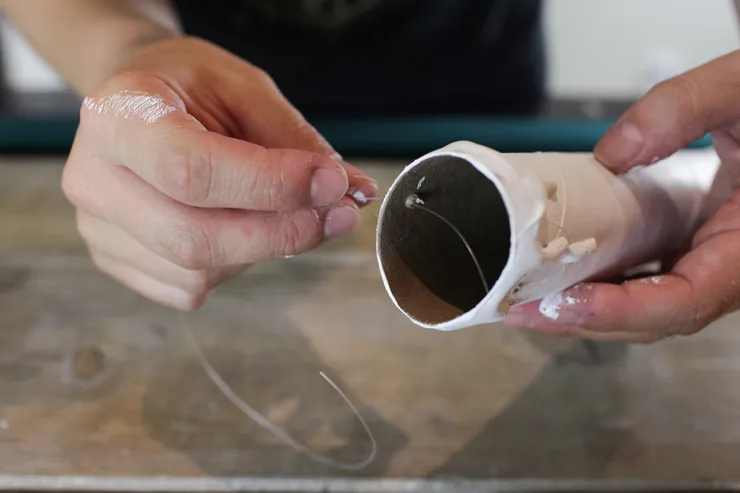
- Your candle is ready. Now you can hang it in your hall to turn it into The Great Hall and relive the magic every day.
Check out this video by Corinne Leigh for the complete guide.
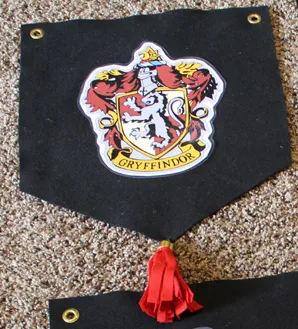
7. Hogwarts House banners
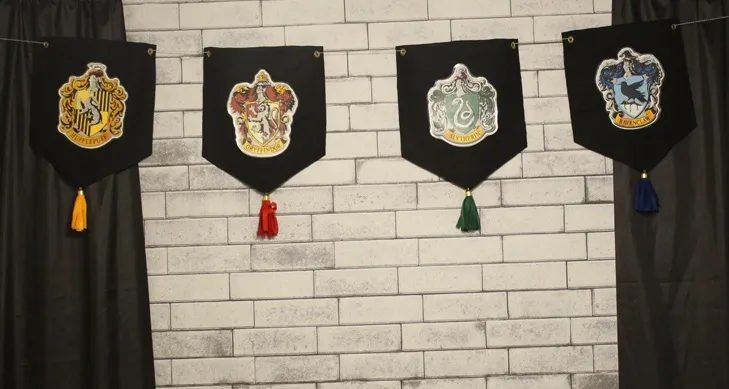
These pretty little house banners can be used for your living room decorations when you can't decide which house you love the most.
Materials needed for this DIY are:
- Black felt
- Red, Green, Blue, and Yellow felt
- Glue ***
- House crest printout
- Gold or silver metal caps
- Ice cream stick
- Grommet Setter
- String
With these materials in hand, follow the following steps for this DIY:
- Cut four equal pieces of black felt and them in a way such that there is a point at the bottom.
- Stick the house crest printouts with the help of a glue *** on the black felt pieces.
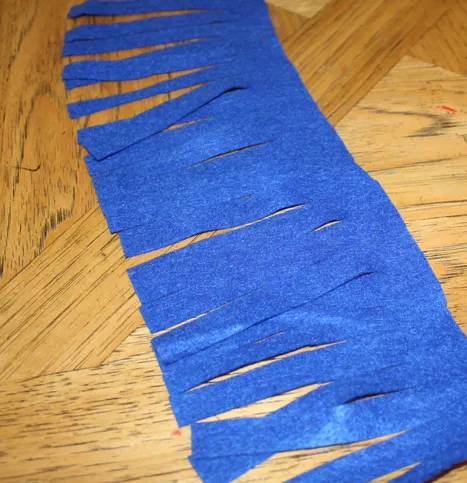
- To make tassels, cut a long strip from Blue felt. Cut little stripes from but leave a little 1/2 inch space on the edge. Make sure that stripes are equally distanced. Repeat the same process for the other 3 colors.
- Apply some glue on the edges of the strips and roll them tightly.
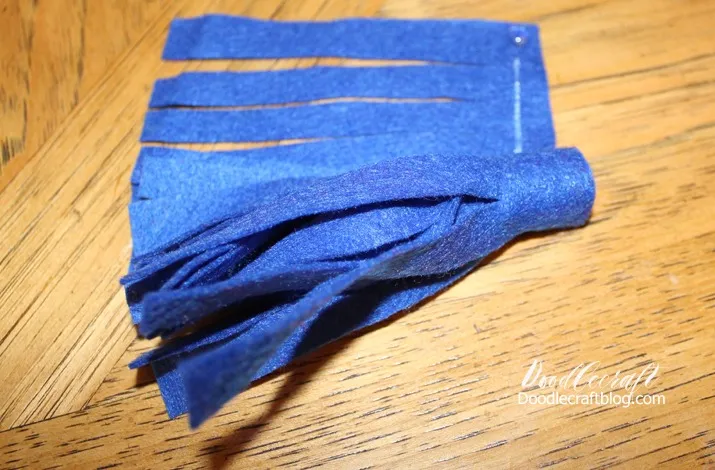
- Now put one of the metal caps on each tassel.

- Sew these tassels at the end of the banners.
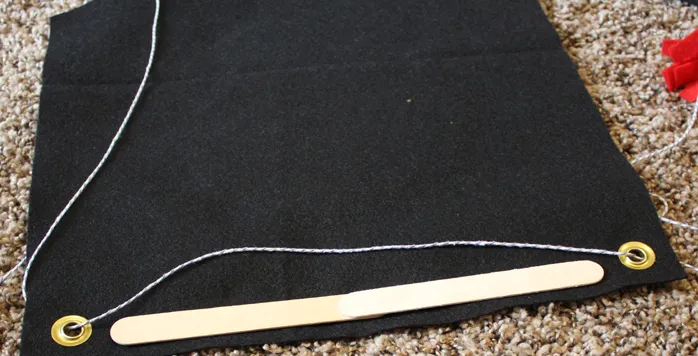
- Stick one ice cream stick on each of the banners so as to give them support.
- Pin two holes on the sides of each of the banner and stick a grommet setter on the holes.
- Thread the banners up and your Hogwarts house banner is ready!
8. Alohamora key rack

This simple yet elegant key rack will ensure that you don't lose your keys again. A woodblock, white acrylic paint, small hooks, and a paintbrush is all you need for this easy DIY.
9. Quirky Elves Notice
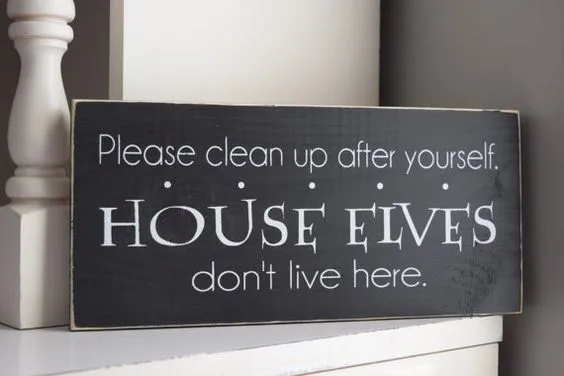
This DIY is for all the Potterhead moms out there. This can be a quick little way to teach your kids the habit of cleaning up after they are done playing. Use a thin woodblock, paintbrush, glue, and white acrylic paints for this quirky notice.
10. Harry Potter Spellbook
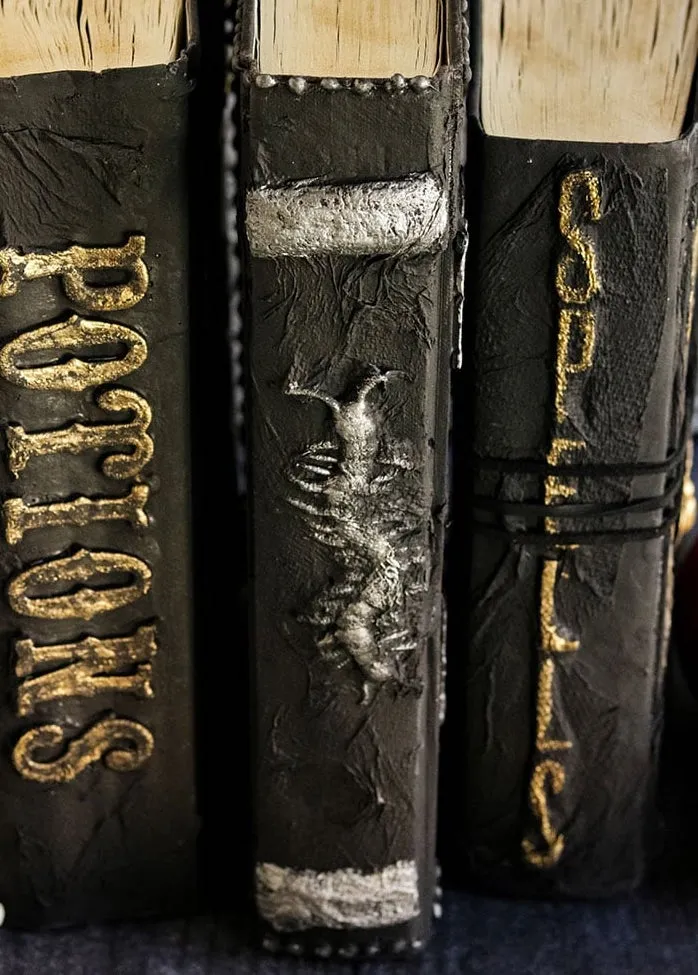
Transform your basic bookshelf into a harry potter inspired bookshelf in no time. You can use old, discarded books to give a vintage look to your DIY.
Materials needed for this DIY are:
- Hardcover books
- Distressed Ink
- Mod podge
- Tissue Paper
- Glue ***
- Silver or gold metallic paint
- Black paint
- 3D Alphabets
- Paintbrush
With these materials in hand, Follow the following steps to make this easy DIY:
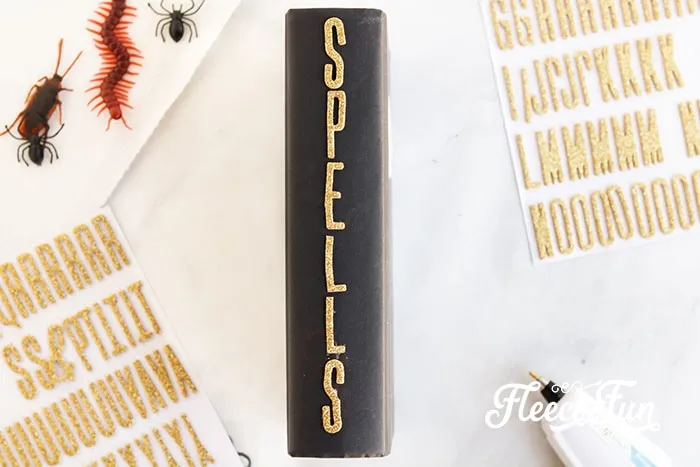
- Stick the 3D letters on the book cover. You can spell out spellbooks or any other word of your choice.
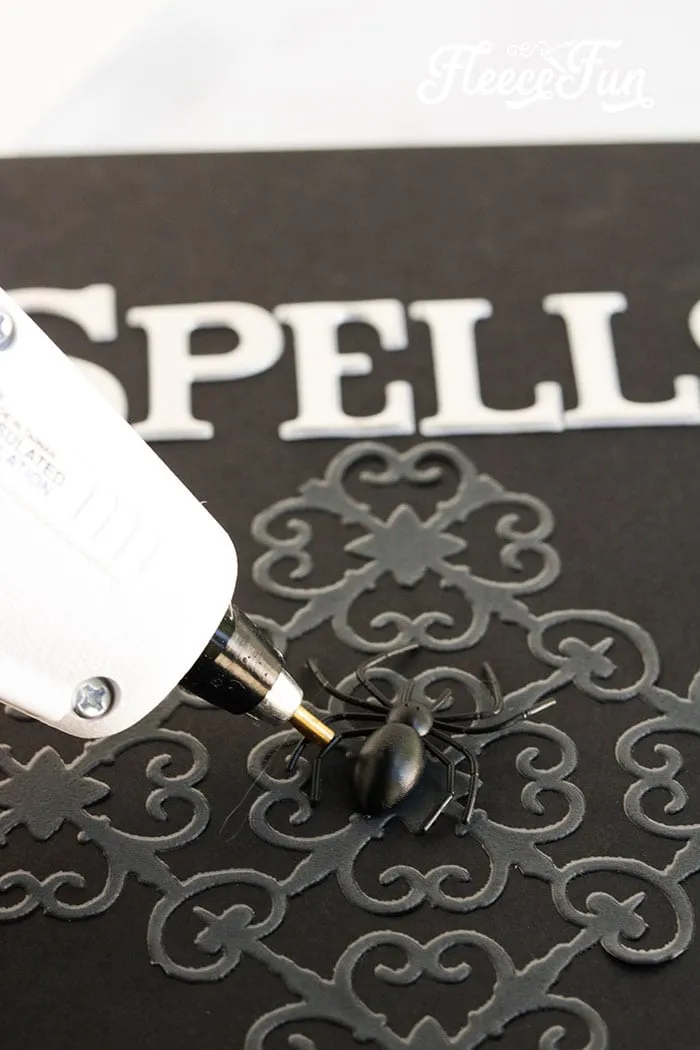
- With the help of a glue ***, you can make any design you want on the cover. Stick some fake spiders on the cover to give it a spooky look.
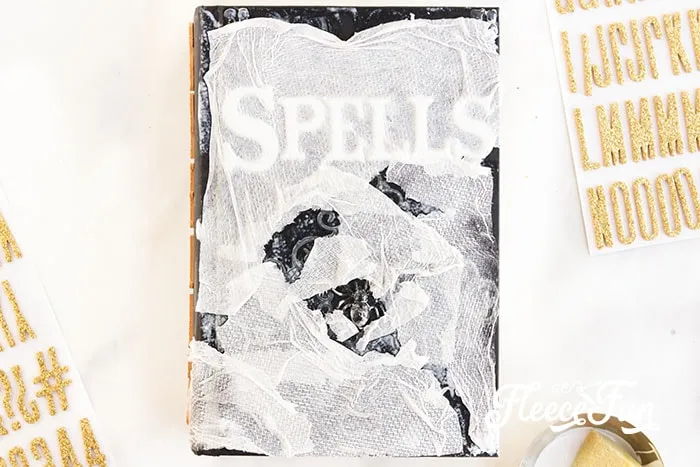
- Cover the word with tissue paper and apply mod podge on it to give a vintage look.
- With the help of a hairdryer, dry the cover and then paint it black except for the word that you spelled out.
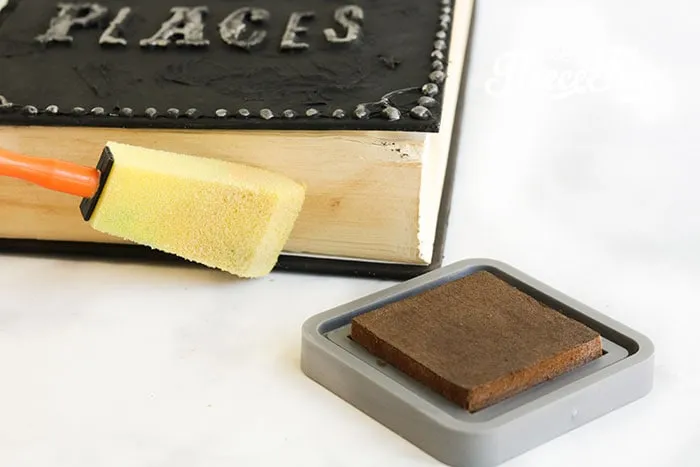
- Apply some distressing ink on the sides of the papers to give an old book look.
- Give a finishing touch to the word on the book cover with silver or gold metallic paint.
- Dry all these out with a hairdryer.
- Your Spellbook is ready!
11. DIY Golden Snitch
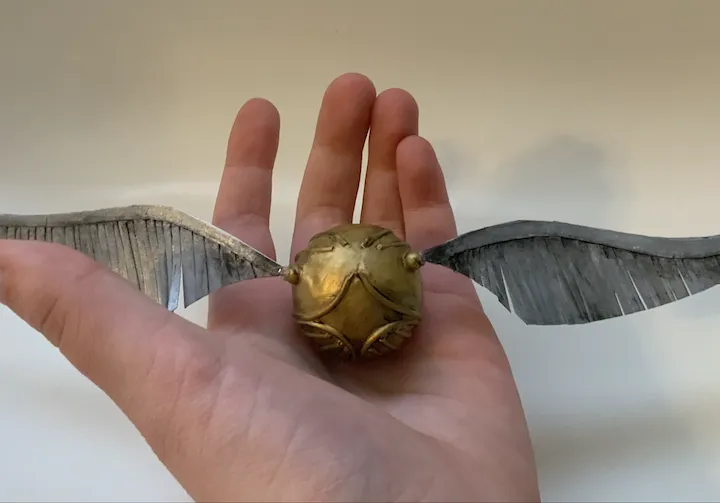
''I open at the close''. This quote is cryptic and beautiful at the same time just like the golden snitch. Who knew that the golden snitch could be opened.
Materials needed for this DIY are:
- Clay
- Golden and silver metallic paint
- Toothpick
- Sheet of plastic
- Paintbrush
- Scissors
With these materials in hand, Follow the following steps to make The Golden Snitch:
- Cut two identical wings from the sheet of plastic.
- Paint the wings silver and let them dry for some time.
- Make a ball from the clay, the same size as that of a table tennis ball, and with the help of a toothpick draw the designs on it.
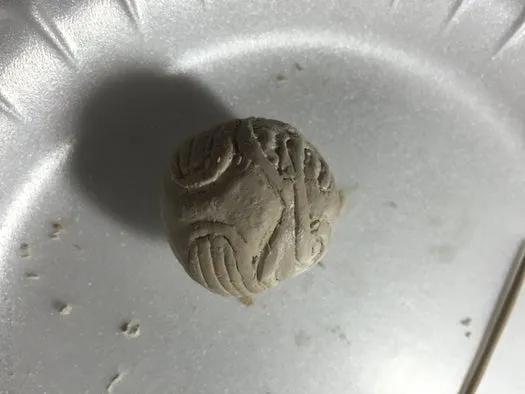
- Stick the wings in the ball, when the clay is still dry.
- Paint the ball golden. Try not to paint the wings golden as well.
- Let it dry.
- Your Golden Snitch is ready!
You can hang multiple golden snitches around or can simply put on your coffee table.
12. Platform 9 3/4 Door cover
We all flinched a little when Harry ran the first time through the wall but it was safe. This pretty and easy DIY Can be used as a door cover, A wall decoration, or also as a curtain.
You are going to need these materials for the DIY:
- A big cloth according to the size of your door
- Foam
- Red paint
- Hot glue ***
With these materials, Follow the following steps to make your DIY door cover:
- Take out the red paint on a big plate, That can fit the piece of foam.
- Spread out the cloth on the floor.
- Dip the lower part of your foam in the paint and press the foam on the cloth.
- Repeat this process until you have covered all the space on the cloth.
- Let it dry for some time.
- Paste the dried door cover on your door's upper part with the help of a glue ***.
But remember to not run into it because unfortunately, we are living in a muggle world.
13. Azkaban Prisoner Mirror/Halloween costume
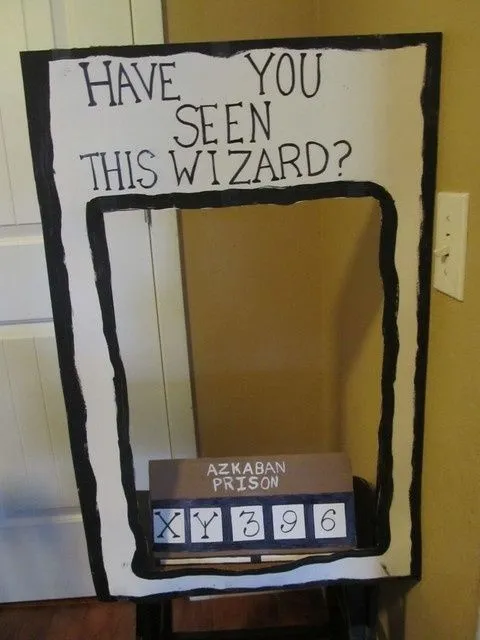
This DIY is going to help you in two ways. You can use this as a Halloween costume and after that, it can serve the purpose of a mirror frame. Stick a mirror in the middle of the frame, and suddenly everyone is an Azkaban prisoner. You can place this mirror near your front door so that everyone knows what is their correct identity.
14. House Points Counter
100 points to Gryffindor for studying this year! Dumbledore needed an excuse to award points to Gryffindor and we all witnessed in books as well as movies. But you can change that by making this DIY.
Materials needed are:
- Red, Blue, Green, and Yellow beads.
- Big glass tubes with a cap.
- House crest
- Glue ***
Steps to make the House points Counter are:
- Stick the house crest on the lower part of the glass tube with the help of the glue ***.
- Fill the tubes with the beads according to your choice.
- Close the lid and place it around your home.
Make your house win or let no one win this year, the choices are endless. Moreover, this will not only show off your house pride but also give a splash of colors to your room.
15. Weasley wall clock
The Weasley family was the perfect family and the clock that they had was one of the best enchanting things to be shown in the books and movies. We all wanted to have one of those clocks which could show us where our loved ones are.
Materials needed for this DIY are:
- Double-sided tape
- Scissors
- A pen
- A paper clip
- Printout ( 1 clock printout, 1 printout of faces, 1 spoons printout)
With these materials, follow the following steps for this cool DIY:
- Cut out faces and spoons from the printouts.
- Tape the faces on top of the spoons.
- Take one paper clip and push one of its sides upwards.
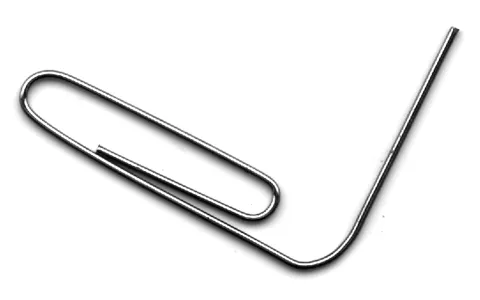
- Push the clip into the center of the clock and secure it with tape.
- Label each spoon with the name of the respective Weasley.
- Stick the spoon from the middle into the clip that's coming out from the center of the clock.
- Bend the paper clip down so that the spoons can't come out.
- Your clock is done!
16. Deathly Hallow String Art
"The deathly hallows together make one master of death". Your dream to possess the deathly hallows is going to come true.
Collect the following materials for The Deathly Hallows DIY:
- Nails
- Hammer
- Woodblock
- Pencil
- Scale
- Black string
- White felt according to the size of the woodblock
- Glue ***
Follow these steps to make the DIY:
- Stick the white felt on the woodblock with the help of a glue ***.
- Trace the Deathly hallows sign on the white felt.
- Hammer the nails on the traced sign. Make sure they are evenly distanced
- Start spiraling the black thread on the nails. Take two rounds and move on to the next nail.
- Repeat the process until you are satisfied with the model.
- You have a brand new Deathly Hallows symbol and you are now one master of death.
17. Harry Potter Calendar
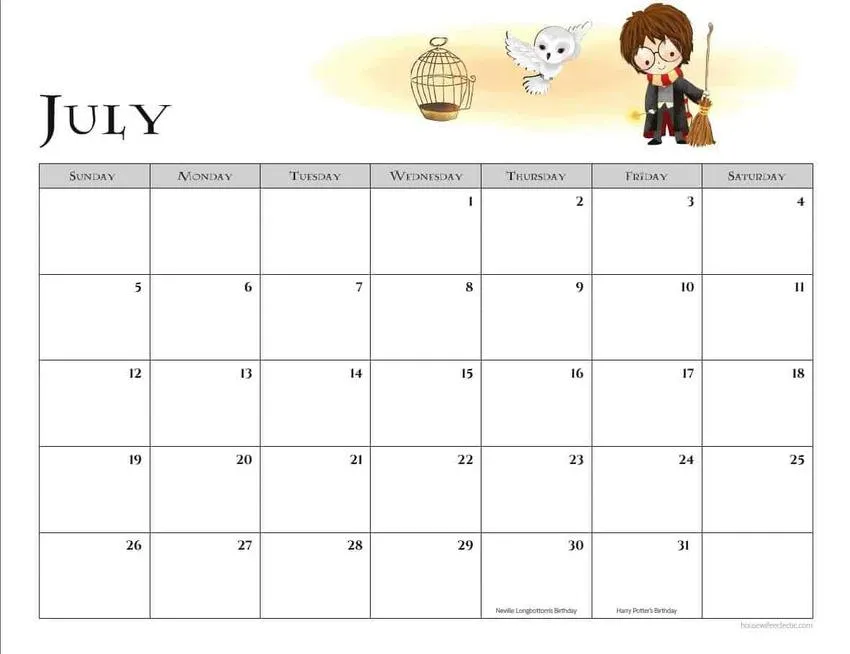
Housewife eclectic has these amazing templates that can be downloaded for free! You can print these templates and make your own harry potter calendar. You can follow mixed up craft's video to know how to make a desk calendar.
18. DIY Harry Potter Dresser
If we are decorating our home, then even the dresser needs a makeover. This Harry Potter inspired makeover is surely going to make heads turn.
Materials needed for this DIY are:
- Vintage bag handles
- Mod Podge
- Tissue papers
- The paint of your choice
- Brush
- Glue ***
- Sandpaper
- Varnish
With these materials, Follow the following steps For this easy DIY:
- Clean the drawers with sandpaper.
- Start painting the drawers. Each Drawer will be of different colors.
- Let the paint dry. When the paint is dried, cover it with varnish for a little shine and protection.
- Stick the vintage bag handles with the help of a glue *** on the drawers.
- Mold the tissue papers with the help of mod podge into a severed hand and color it with brown mixed with red color to make it more realistic.
- Your Harry potter inspired dresser is ready!
No matter what our age or color or country is, we all love Harry Potter. Try these DIYs out and relive the same magic every day.
Opinions and Perspectives
My whole family got involved with these projects. It's become our weekend tradition!
Think I'll start with the Lumos switch and work my way up to the more complex projects.
Currently planning the floating candles installation. Any tips on spacing them evenly?
These projects really brought some magic into my home. Thank you for sharing these ideas!
The Deathly Hallows art is now the focal point of my office. Colleagues keep asking about it.
Making the flying keys this weekend. Found some vintage keys at a flea market that'll be perfect.
Used the spellbook idea for my journal covers. They look fantastic on my shelf!
That Weasley clock is genius for working parents. My kids love knowing when I'm heading home.
Started with the simple switch labels and now I'm hooked. Working my way through the whole list!
The house elf notice actually got my kids to clean their rooms. Magic does exist!
Been collecting materials for the floating candles. Planning to do my dining room ceiling.
The dresser project inspired me to do my whole room in Harry Potter theme. No regrets!
Love how the Lumos/Nox switch makes such a simple thing magical. My kids won't stop saying the spells!
Successfully made the Golden Snitch! Used a plastic Christmas ornament as the base instead of clay.
These are amazing but some seem quite time-consuming. The mural especially looks like a weekend project.
Tried the plant pot design but the paint kept chipping. Need to find a better sealant.
The key rack is practical and subtle. Perfect for those of us who want magical touches without going overboard.
Made all four house banners but can't decide which to display. Guess I'll rotate them seasonally!
The Platform 9 3/4 idea is clever but I used it for my closet door instead. Less obvious to visitors.
I've done the house points counter with mason jars instead of tubes. Works just as well and cheaper too.
Anyone else think the spiders on the wands might be a bit much? Ron would definitely not approve!
These projects would be perfect for a Harry Potter themed party. Planning to use several for my kid's birthday.
Just finished the Azkaban mirror frame. Used foam board instead of wood and it worked great!
The mural idea is awesome but I went with removable wallpaper instead. Same effect, less commitment.
I combined the floating candles with fairy lights for extra ambiance. Looks magical at night!
That Harry Potter calendar is perfect! Been looking for ways to organize my schedule with some magic.
Really appreciate how most of these projects use common household items. Makes it much more accessible.
The Deathly Hallows string art is harder than it looks. Took me three tries to get the geometry right.
My daughter and I made the wands together. Such a fun bonding activity! We added different colored paint for each one.
These are great but some materials seem hard to find. Where do you get ornamental keys for the flying keys project?
Made the floating candles for Halloween and kept them up. They're surprisingly sturdy if you use strong fishing line.
The dresser makeover is stunning but seems like a huge undertaking. Anyone actually completed this?
Not sure about the house elf notice. Feels a bit like promoting unpaid labor if you think about it.
I tried the key rack and it looks amazing! Added some small potion bottle decorations next to it.
The house points counter is perfect for my classroom! Going to use it as a behavior management system.
Love these ideas but some seem pretty ambitious. Maybe start with the simple ones like the Lumos switch?
Just finished the spellbook project. Pro tip: use metallic Sharpies instead of paint for the lettering. Much easier to control!
The golden snitch decoration seems a bit delicate. Mine broke after a week. Maybe using a different material would work better?
Can't wait to transform my boring plant pots with HP designs! Anyone know which paint works best on terracotta?
Really want to try the mural idea but I'm nervous about painting directly on the wall. What if I make a mistake?
That Weasley clock is genius! I'm definitely making one to track my family members.
The Platform 9 3/4 door cover is such a creative idea! Though my husband thinks it's a bit too much for our front door.
Actually the house banners aren't too hard! Just seal the edges with fabric glue first. Worked perfectly for me.
Those house banners look complicated to make. I tried but the felt kept fraying. Any tips?
I'm concerned about the floating candles with the fishing line. Wouldn't it be a fire hazard? Maybe LED lights would be safer?
The Lumos/Nox switch idea is brilliant! Just did this in my bedroom and it makes me smile every time I turn on the lights.
Made the wands with my kids last weekend. They turned out great! Used hot glue for the spiral design and they look quite authentic.
I absolutely love these DIY ideas! The floating candles would look amazing in my entryway. Has anyone tried making them?
