10 DIY Cat Ear Ideas To Get You Meowing
Though Halloween is still a ways away, it is never a bad opportune for channeling your inner Neko, by taking inspiration from those cozy beings and your own sense of creativity.
But how do you decide where to get started?
Here are 10 DIY cat ear ideas that will get you feeling as relaxed as a feline in no time:
1. Paper Cat Ears
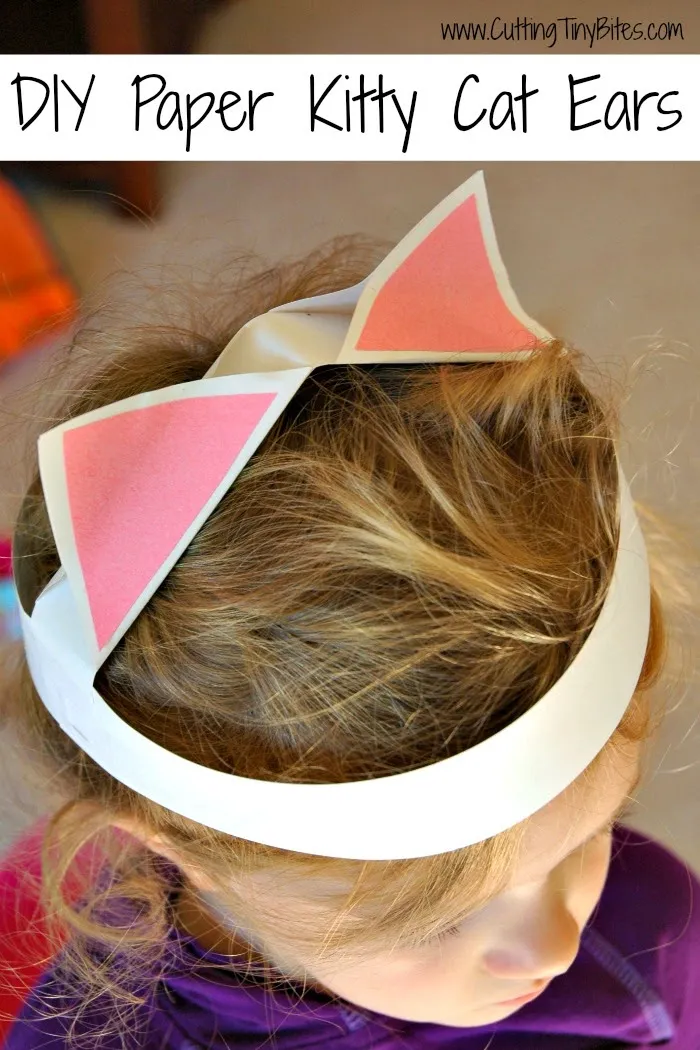
Where better to start than with something you can make using what's already lying around the house? For those watching their budget, this is the DIY for you.
All you need is a pair of scissors, 1 sheet of white construction paper, some bits and pieces of pink construction paper, Scotch tape and/or a stapler, and a glue stick.
Steps to make paper cat ears:
- Cut the white construction paper into three pieces, with each being 1 inch wide, going along the long edge. Two pieces will act as the headband, while the other will help attach the ears
- Staple or glue together the two strips so that they fit comfortably around your head
- Cut the remaining strips into triangles and fold them in half and set them aside
- With the pink paper, cut triangles about half an inch wide on the long edge
- Glue pink pieces to the white ears, with the pink facing outward
- Fold the third piece of white paper and attach the ears so as not to reveal parchment
- Fold and attach the ears so they stand up along the top of your head
- All things considered, you will look fabulous
Even when on a budget, making these ears is a cakewalk, both on the wallet and for time's sake.
2. Wire-Band Cat Ears
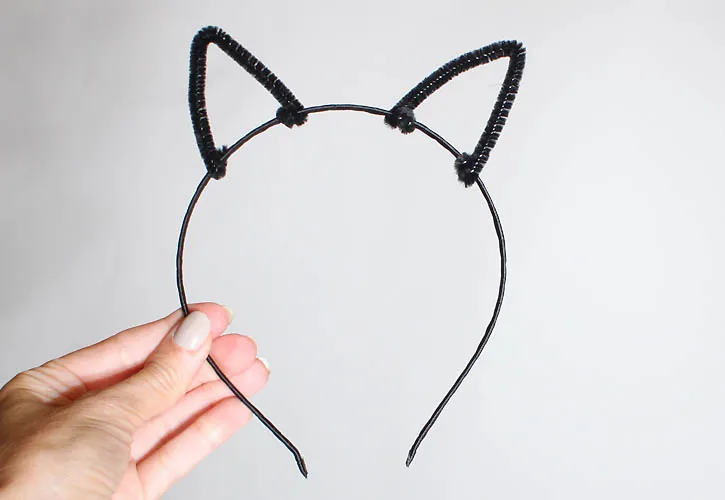
Next are the cat ears for those who are already into fashionable accessories coupled with simplicity.
To be more specific, this one will require a standard hairband, in addition to glue, 2 black (or orange, brown, or red in the event that you wish to spice things up) pipe cleaners, scissors, and some leather or felt.
Steps to make wire cat ears:
- Fold the pipe cleaners into the shape of triangles
- Glue a small patch of leather to each ear; let dry then fold so it covers the entirety of the ear, then trim with scissors so it looks neat
- Glue a small piece of contrasting-colored leather to the inside of the ears (optional)
- By and large, you will have made something so elegant with such a simple process (and that's something to admire)
Thanks to the sleek, compact design of these ears, one can show represent the inner feline with this accessory.
3. Headphone Cat Ears

If you wish to relax at home after a long day but also want to feel like a cat, these ears will help meet both needs.
To make these comfortable lugs, you will need pink and white felt, a needle and thread, and of course headphones.
Steps to make cat ear headphones:
- After folding the pink felt, cut into the shape of cat ears at your desired size; should be proportionate to the headphone band length and width
- Cut the white felt so it fits into the pink felt, making sure the shape is pointy but rounded
- Wrap pink felt around headphones and sow tightly; wouldn't want the ears to fall off while jamming out
- Stitch the white felt so it becomes one with its pink counterpart; do so with the other ear as well
- In essence, you can now listen to music like a cat
When the mood to dress as an animal occurs, all the while listening to music, these ears will suit both needs.
4. No-Sow Cat Ears
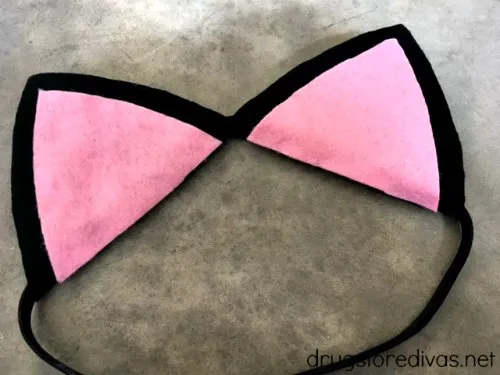
For those too afraid to pick up a needle, in fear of puncturing their precious mitts, these ears should be no cause for concern.
To make these dashing ears, you will need a glue gun, hot glue sticks, scissors, a no-slip grip headband, 1 sheet of pink felt, and 1 sheet of black felt.
Steps to make sow-free cat ears:
- Fold the black felt in half and cut it into two triangular pieces; do the same with the pink felt, but make sure it is slightly smaller than the black
- Apply hot glue to each piece of the pink felt and fold it in half so that it still has the shape of a triangle
- Fit black felt against headband and fold after applying hot glue; make sure the pieces are spaced out evenly and allow them to dry
- Glue pink felt to the black so that it is facing out of each ear
- Place ears on your head and see if your cat likes them too
Trypanophobia has no place in these ears, as there is no need to get out the sewing kit and risk fainting from nerves.
5. Bead Cat Ears
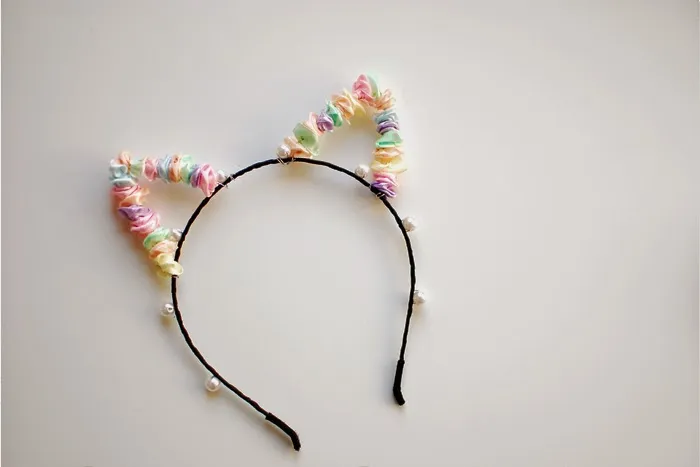
Finally! A use for beads besides bracelets and necklaces. When people see you wearing this piece, their eyes will be wider than the little wonders lining your faux ears.
For this accessory, you will need an aluminum wire (12 gauge of course so the accessory doesn't get bent out of shape), pliers, wire cutters (wouldn't want to dull your scissors), regular and/or rose-shaped beads, and a standard headband.
Steps to make bead cat ears:
- Make two cat ears using the wire, making sure to stay proportionate with your head, and bend them to get just the right point
- Place the wire ears besides your headband to get an idea of proper placement before bending them to fit in place
- Place beads along the wire in any desired pattern (or go with brown, black, and white if you're a traditionalist)
- Wrap wire ends around the headband so they are secure and, using the cutters, discard any excess wiring
- Take this number out on the town and flaunt your spectacular headdress
After the craft fair, rather than letting those extra beads collect dust, it would be more beneficial to model them into something a little feline-oriented.
6. Veiled Cat Ears
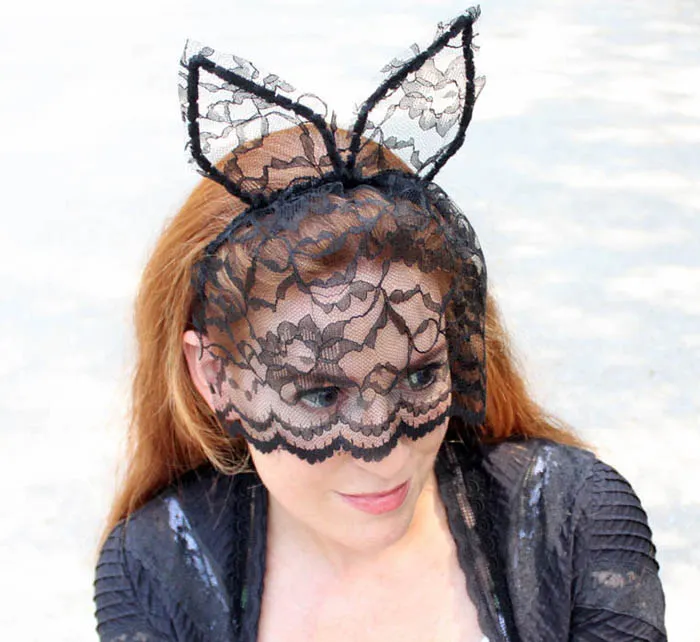
Ever want to feel like a cat, all mysterious and looking to make your true self seem like an enigma? Coupled with being fashionable, these ears will enhance your crafty aura and have onlookers wondering what your true intentions are.
For these elusive ears, you will require black pipe cleaners, non-stretch lace with a scalloped edge, a satin headband, and a needle & thread.
Steps to make veiled cat ears:
- Wrap the end of one pipe cleaner around the headband so it fits tightly; repeat with the other pipe cleaner
- After ensuring even spacing, bend the pipe cleaners to achieve that good ol' triangle shape identically for each ear
- Cut some lace pieces just big enough to wrap around the ears
- Sew the lace so that it encapsulates the ears
- Trim the edges of the lace, leaving just a little border around each ear
- Stretch headband so it fits just to right to your head; for a good measuring, use a six-inch bottle to hold the band open
- Cut any corners on the lace fabric so it looks elegant
- Fold lace scalloped side down, with the fabric being nine inches high and 15 inches wide, so that covers your head like a tent
- Cut the unfolded edges of the lace so they appear curvy
- Line thread through the lace just so it is hanging loose
- Tug thread to gather the lace in one place
- Stretch veil across the headband, making sure it is even with the headdress, and stitch it together
- Go out at dusk and hope no one will think you're doing anything suspicious whatsoever
Being sneaky is what cats do best, and these ears will create the illusion that one can do the same when nightfall descends.
7. Clay Cat Ears
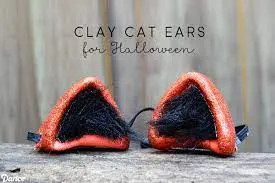
All the greatest sculptors have to start somewhere, and if that is your dream, then these ears are just the starting line. Though clay may not seem like a fashionable material, you can prove naysayers wrong with these.
To get those grabbers warmed up, you should gather acrylic paint (bronze, copper, orange, whatever is good), false fur (whatever color suits your ear needs), colored glitter, air-dry clay, Mod Podge, elastic pieces, paintbrushes, scissors, and a hot glue gun.
Steps to make clay cat ears:
- Roll a ball of clay so that it fits squarely in your palm (sounds like a misnomer, but it's not) then press in the center to get a triangular indentation; repeat for the second ear
- Mold the spheres into triangles, making sure the indentations don't change shape
- Hold one sphere with one hand while pressing the base with the other hand to achieve an inward curve; repeat for the other ear
- Allow ears to sit until they dry and harden (usually takes a day or two), then poke two holes under each corner of both ears for the elastic
- Paint ears (use whatever color will match the glitter) then, after the paint dries, coat in Mod Podge and sprinkle with glitter on the inside and outside
- Let glitter coat settle then add one more layer for extra pizazz
- Apply a little hot glue in the earholes and attach an even amount of faux fur for each ear
- Carefully(!) thread the elastic around the corner holes of the ears; then, tie the ends of each band and fix it in place with hot glue
- Tie bands to head so ears stick out (can also attach to headband with hot glue)
- By and large, you will be the life of the party with your dainty new hearing instruments
For all the aspiring sculptors out there, these ears are a good way to hone one's skills with clay and look elegant while doing so.
8. Wooden Cat Hairpin
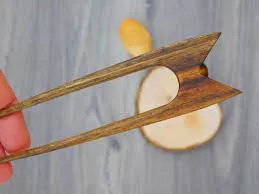
After the stone age, the idea that wood can also be used to make accessories came to mind. If you wish to dust off that old tool shelf, you can make a nice set of cat ears using only a few simple components.
To get this one going, you will need some pieces of unfinished wood (at least half an inch thick), sandpaper, and a miniature electric detail knife
Steps to make a wooden cat hairpin:
- Using the knife, cut out a rectangular piece of wood thin enough to fit in your hair without weighing down your head; ideally, 4 to 6 inches, depending on hair length
- Cut a groove along the top of the wood piece, then fashion each side into triangles
- Cut out the center of the wood piece and apply sandpaper to get it as smooth as possible
- Stick these in hair and go about your day with this lightweight feature
For those who don't want anything bulky weighing down the old hairdo, this little number allows for accessorizing while minimalizing.
9. Cat Ear Paper Plates
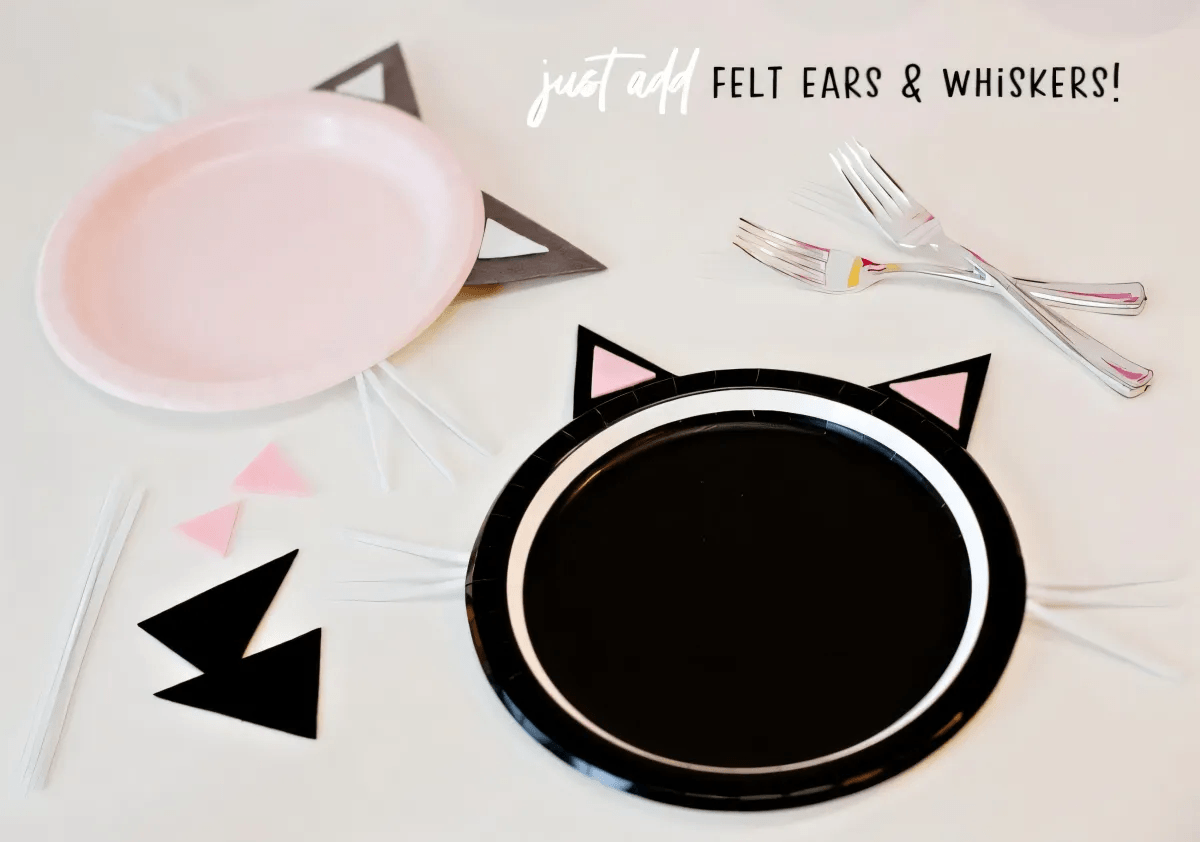
It's birthday time again, and if you really want to make someone's day, you could break out these special plates when it's time for cake.
To make these plates, you will need pink paper plates, black paper plates, scissors, black, white, and pink felt (should be stiff variety to avoid drooping), and a hot glue gun
Steps to making cat ear plates:
- Cut out black and white felt into triangular wedges about three inches long, set aside
- Cut remaining white felt into thin strips, less than an inch thick, and set aside
- Cut the pink felt into triangular wedges a little less than two inches in length; make sure they fit inside other wedges and are proportionate in size
- Apply hot glue and attach pink wedges to the ears facing outward, then attach to the top of the plate
- Dab sides of plates with hot glue and attach three white felt strips; repeat until the desired number of cat ear plates are made
- Bring these to the party, and you'll be the life of it
For those who love cats but don't want the celebration to be disturbed, these plates will allow for feline representation minus the mayhem.
10. Cardboard Cat House
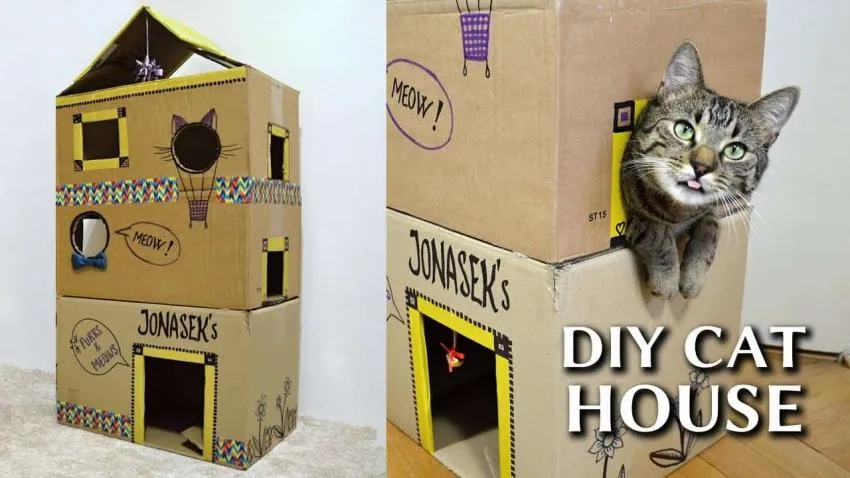
Last but not least (unless you're referring to price) you have the option to craft a miniature house with the same stuff that Amazon boxes are made of. With this in mind, if your budget is lacking, you may not need to spend any money at all!
For this basement bargain abode, you will need corrugated cardboard, scissors, a hot glue gun, and colored Sharpie markers
Steps to make cardboard cat abode:
- Lay the boxes on the floor and stack them until the desired height is met
- Cut holes in the boxes wide enough for your cat to fit through
- Pull boxes aside and draw on them to your cat's hearts delight
- Assemble boxes and attach with hot glue
- Optional; Cut discarded cardboard pieces into cat ears and attach
- Set this thing aside and hope your cat actually uses it
In the event money is tight but there is still a well-deserving feline who needs a home, this DIY domicile will fit the bill.
. . .
For every great thing in today's world, there are just as many if not more reasons to be stressed by it, but with these DIYs, those negative feelings will wash away.
Opinions and Perspectives
These instructions are so clear even my craft-challenged friend could follow them.
The paper plate idea saved my daughter's birthday party when I forgot decorations.
Added some battery-operated fairy lights to the cardboard house. My cat loves it!
These projects are great for teaching kids about crafting and recycling.
I added LED lights to the clay ears for a night time festival. Looked amazing!
The headphone mod looks cool but I'm worried about ruining my expensive headset.
Made the paper plate version for my niece's birthday and all the kids wanted a set!
Found that hot glue works better than regular glue for the felt pieces.
The cardboard house was a hit with my cat, especially after I added some catnip inside.
These are all so creative! I never thought of using beads for cat ears before.
Love how detailed the instructions are for each project. Makes it so much easier to follow along.
My kids destroyed the paper ones in minutes. Definitely need something more durable.
The veiled version seems perfect for a wedding. Anyone tried making them in white?
I'm surprised there isn't a fabric-only option. Might try adapting the no-sew design with different materials.
Does anyone know if regular pipe cleaners work as well as the thick ones mentioned?
I combined ideas 2 and 5 to make wire ears with beads. They turned out spectacular!
These would be perfect for my daughter's cat-themed birthday party next month.
The clay version looks amazing but takes way too long to dry. I'm too impatient for that!
I appreciate how budget-friendly most of these options are. Crafting doesn't have to be expensive!
Anyone know where to find good quality felt for these projects? My local store only has the flimsy kind.
Just finished the no-sew version and it was so simple! Perfect for craft-challenged people like me.
I'm concerned about the hot glue gun steps. Isn't that dangerous for younger crafters?
Actually, the paper plate idea is great for kids' parties. They love themed items and it adds to the fun!
Not sure about the paper plate idea. Seems a bit wasteful when we could just use regular plates.
The veiled cat ears are giving me gothic vibes. Perfect for my Halloween costume this year!
I can't believe how creative the cardboard cat house idea is! My cats are going to love this.
The clay cat ears sound amazing but I'm terrible at sculpting. Any tips for a beginner?
Made the headphone ones last week and they work great! Just make sure to sew carefully and not too tight.
Has anyone tried the headphone cat ears? I'm worried they might damage my expensive headphones.
These are perfect for my upcoming cosplay. I think I'll try the wire-band ones since they look more durable than paper.
I love how accessible the paper cat ears are. Just tried making them with my daughter and she had so much fun! The steps were super easy to follow.
